Interior vs Exterior Waterproofing: Which Solution Actually Fits Your Problem?
Reading time: 14 minutes
You’ve noticed the damp patch creeping up your basement wall. Maybe it’s a musty smell that won’t leave, or worse — standing water after every rainstorm. Whatever brought you here, you’re facing one of homeownership’s most frustrating challenges: a wet basement or foundation problem. And somewhere in your research, you’ve stumbled across two camps of professionals, each insisting their approach is the right one.
Here’s the straight talk: both interior and exterior waterproofing work — but for very different problems. Choosing the wrong one doesn’t just waste money; it can make matters worse. In 2026, with average basement waterproofing costs ranging from $3,000 to $18,000+ depending on method and severity, the stakes have never been higher to get this decision right from the start.
Let’s cut through the marketing noise and get into what actually works, when, and why.
Table of Contents
- Understanding the Core Difference
- Exterior Waterproofing: The Source Attack
- Interior Waterproofing: The Management Strategy
- Side-by-Side Comparison
- Real-World Case Studies
- Common Challenges and How to Overcome Them
- Data Visualization: Cost vs. Effectiveness
- Frequently Asked Questions
- Your Dry Basement Decision Roadmap
Understanding the Core Difference: Source vs. Symptom
Before diving into specifics, let’s establish a framework that will guide every decision you make. Think of water intrusion like a leaking roof. You could put buckets on the floor every time it rains — and that manages the symptom. Or you could get up there and fix the shingles — and that eliminates the source. Basement waterproofing follows exactly the same logic.
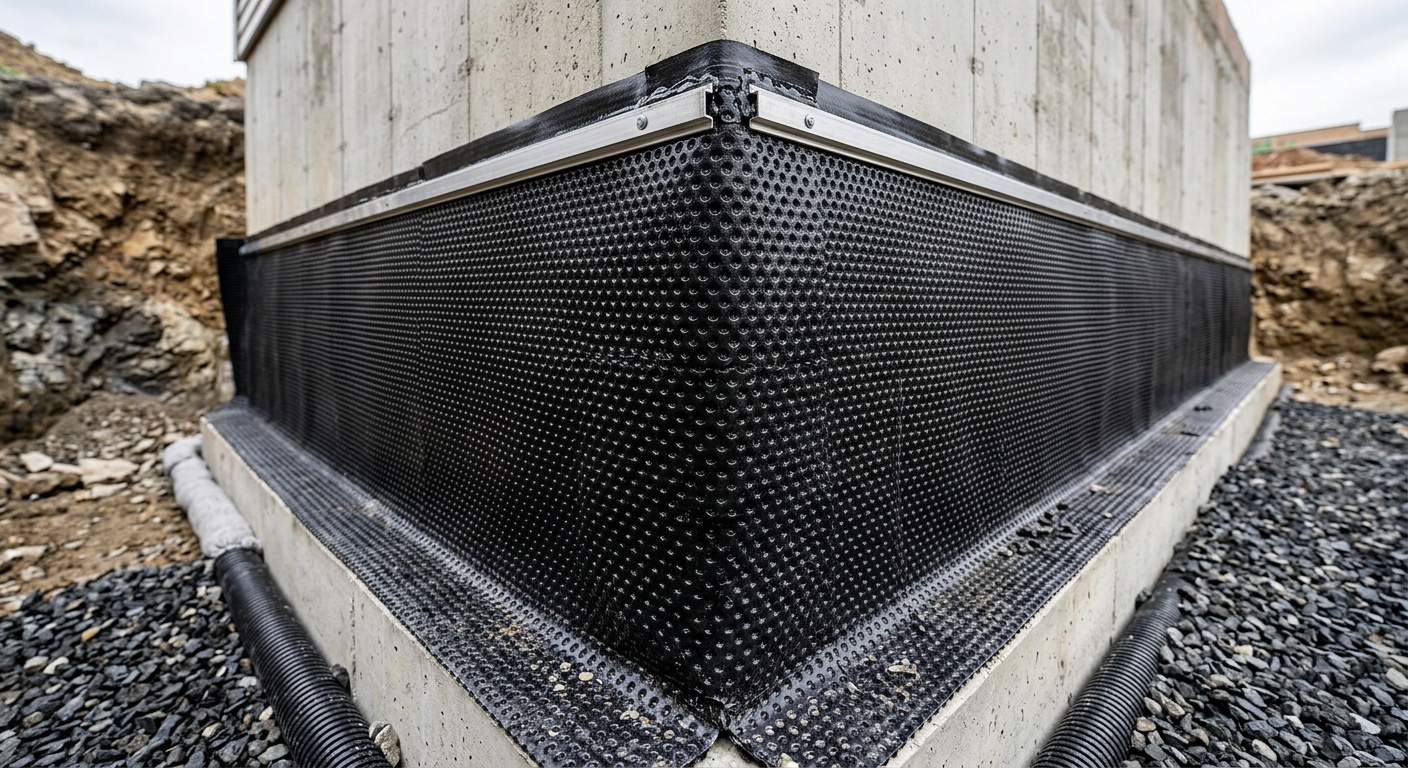
Exterior waterproofing goes to the source. It involves excavating around the outside of your foundation, applying waterproof membranes, coatings, or drainage systems directly to the exterior walls, and stopping water before it ever makes contact with your structure.
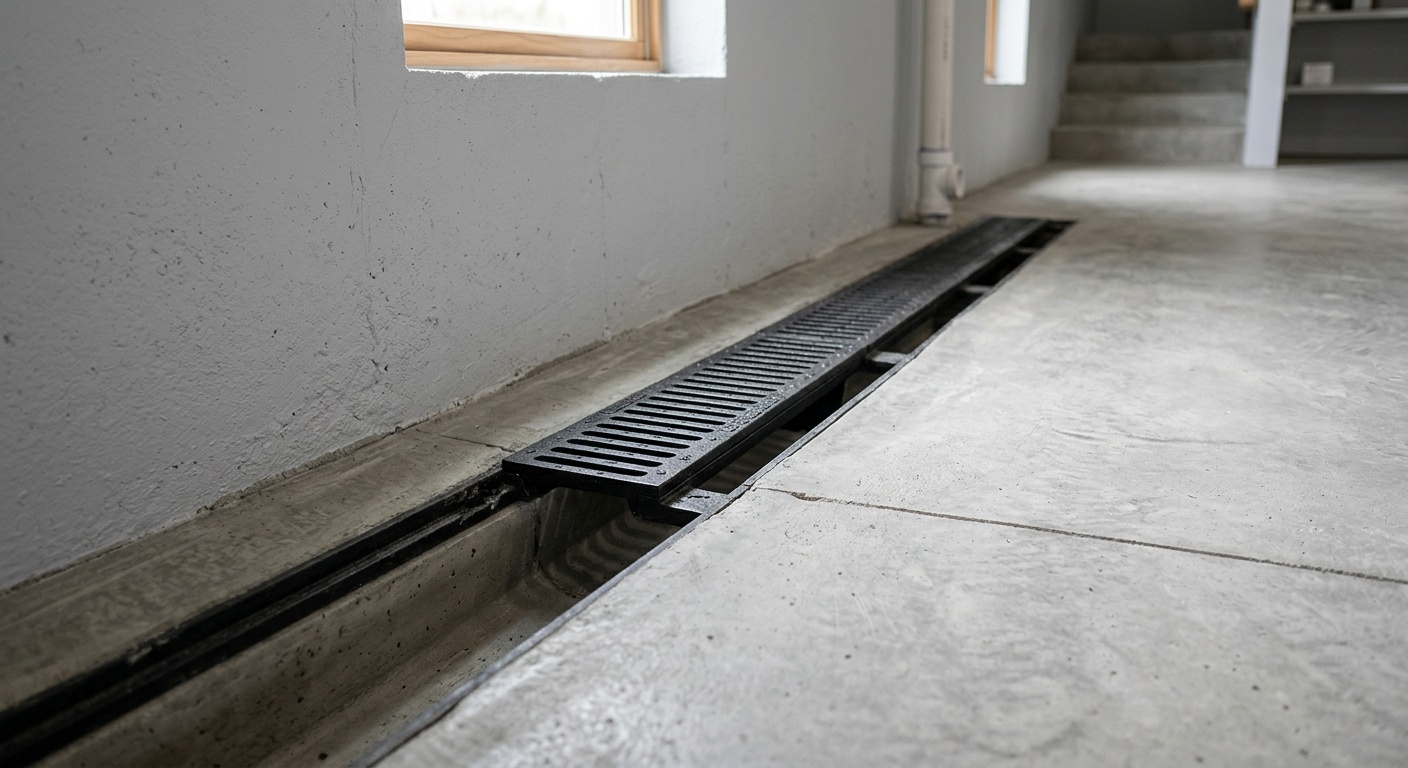
Interior waterproofing manages the symptom. It captures water that has already penetrated your foundation and redirects it away from your living space — typically through drainage channels, sump pumps, and vapor barriers installed inside the basement.
Neither is inherently better. But one is likely far more appropriate for your specific situation. The key lies in understanding where your water is coming from and how it’s entering your space.
The Three Ways Water Gets In
Water intrusion isn’t a monolithic problem. According to the American Society of Home Inspectors, approximately 60% of U.S. homes experience some form of below-grade moisture issue. But the water doesn’t always behave the same way. Here are the three primary intrusion mechanisms:
- Hydrostatic pressure: Saturated soil pushes water through porous concrete or cracks under pressure. This is most common after heavy rainfall or snowmelt events. Hydrostatic pressure is increasing as a concern in 2026 due to more intense precipitation patterns across many regions.
- Lateral seepage: Water moves horizontally through foundation walls where mortar joints have failed or cracks have developed. This is especially common in older homes with block foundations.
- Condensation: Warm, humid air meets cool basement surfaces and deposits moisture. This is often mistaken for a seepage problem when it’s actually a humidity control issue entirely.
Identifying which mechanism is causing your problem is step one. A quick diagnostic test: tape a piece of plastic sheeting (about 12 inches square) to a damp area of your wall, seal all edges with duct tape, and leave it for 24-48 hours. If moisture collects on the wall side of the plastic, water is seeping through from outside. If it collects on the room side, you’re dealing with condensation. This single test can save you thousands of dollars in misdiagnosed treatments.
Exterior Waterproofing: The Source Attack Strategy
Exterior waterproofing is the gold standard — but gold doesn’t come cheap, and it isn’t always necessary. Let’s break down what it actually involves and when it earns its premium price tag.
What Exterior Waterproofing Actually Involves
A full exterior waterproofing project is a significant undertaking. Here’s what a proper installation looks like:
- Excavation: Heavy machinery digs down to the base of your foundation footings — often 8 to 12 feet deep. All soil around the perimeter of the problem area is removed.
- Surface preparation: The exposed foundation wall is cleaned, and any cracks or structural defects are repaired with hydraulic cement or epoxy injection.
- Waterproof membrane application: A rubberized asphalt membrane, polyurethane coating, or modern crystalline waterproofing compound is applied directly to the exterior foundation wall. In 2026, crystalline waterproofing technology has advanced significantly, with products like Xypex and Kryton offering self-sealing capabilities that activate when exposed to moisture.
- Drainage board installation: A dimple mat or drainage board is applied over the membrane to direct water downward and protect the coating during backfilling.
- French drain or footer drain: A perforated pipe is laid at the base of the footing to collect and redirect groundwater away from your foundation.
- Grading and backfill: Soil is replaced with proper grading (6 inches of drop over 10 feet) to direct surface water away from the house.
Done correctly, exterior waterproofing provides a true physical barrier between your foundation and the surrounding soil. It protects the structural integrity of the wall itself — not just your living space. This matters enormously for long-term foundation health.
Cost range in 2026: $8,000 to $20,000+ for an average residential foundation, depending on depth, soil conditions, and regional labor costs. Projects involving utilities relocation, landscaping restoration, or particularly deep foundations can push well beyond this range.
Best situations for exterior waterproofing:
- New construction (by far the most cost-effective time to waterproof)
- Active structural cracks that allow direct water entry
- Severe hydrostatic pressure causing wall bowing or buckling
- Cases where landscaping or hardscaping is already being replaced
- High-value properties where comprehensive protection justifies the investment
Interior Waterproofing: The Management Strategy
Interior waterproofing gets an unfair reputation in some circles. Critics call it “just moving the problem.” In reality, for the majority of residential moisture issues, interior waterproofing is not only effective — it’s the most practical and cost-efficient solution available. The key is understanding what it can and cannot do.
Components of a Modern Interior Waterproofing System
Modern interior waterproofing has evolved dramatically. In 2026, the systems being installed by professional contractors are far more sophisticated than the simple sump pump setups of previous decades. A comprehensive interior system typically includes:
- Interior perimeter drainage channel: A trench is jackhammered along the interior perimeter of the basement floor, a perforated pipe is installed, and the trench is filled with gravel and covered with concrete. Water seeping through walls or up through the floor is intercepted before it reaches your finished space.
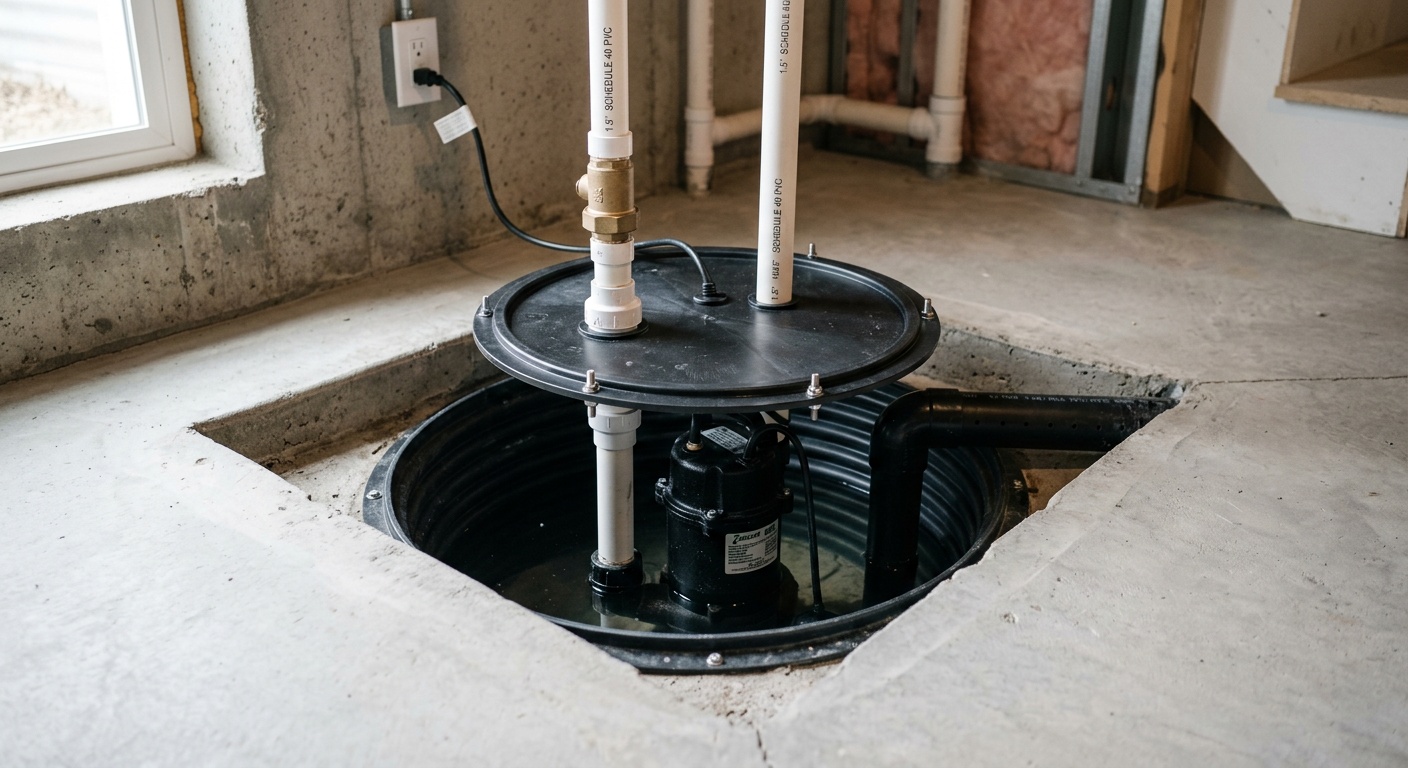
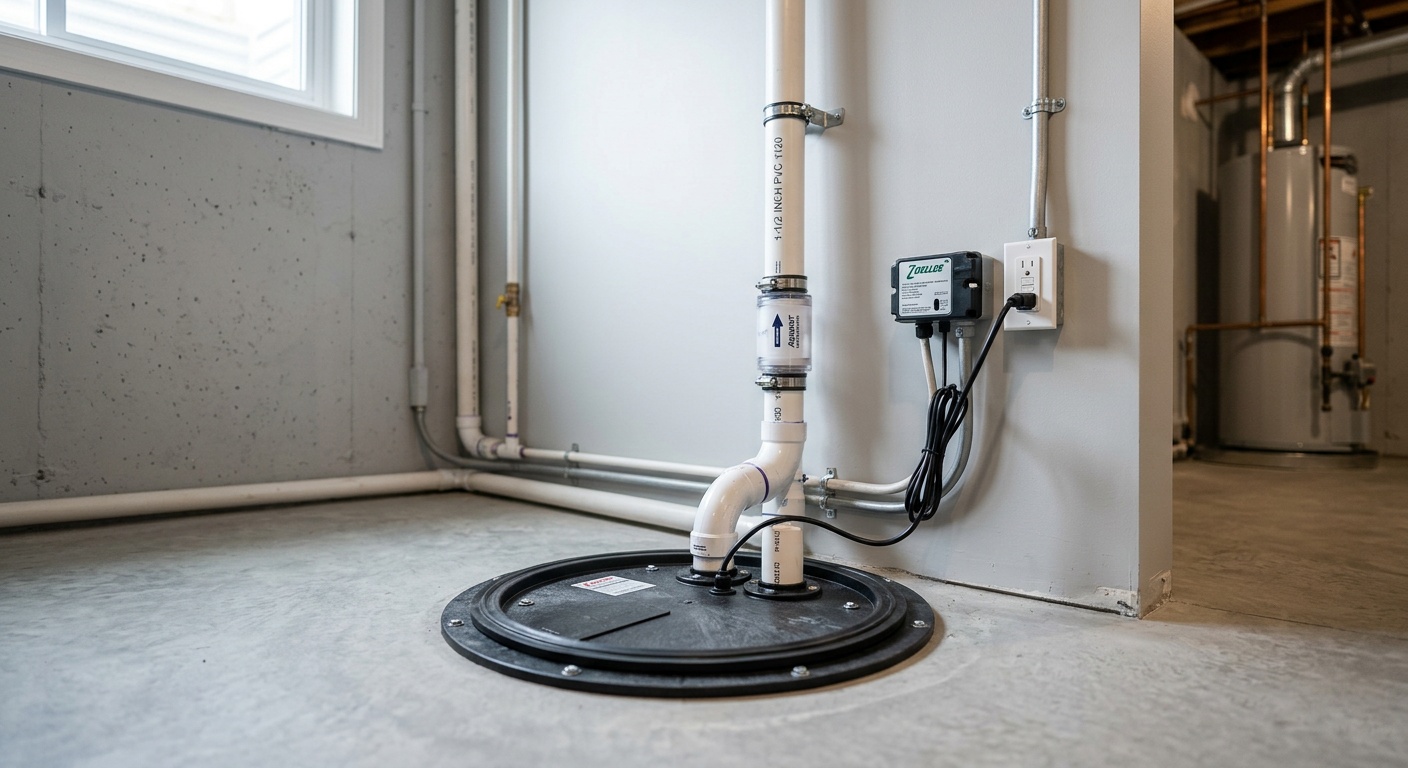
- Sump pump system: Collected water drains to a sump pit, where a primary electric pump (and ideally a battery-powered backup) ejects it away from the foundation. Battery backup systems are now standard recommendations following the increased frequency of power outages during severe weather events.
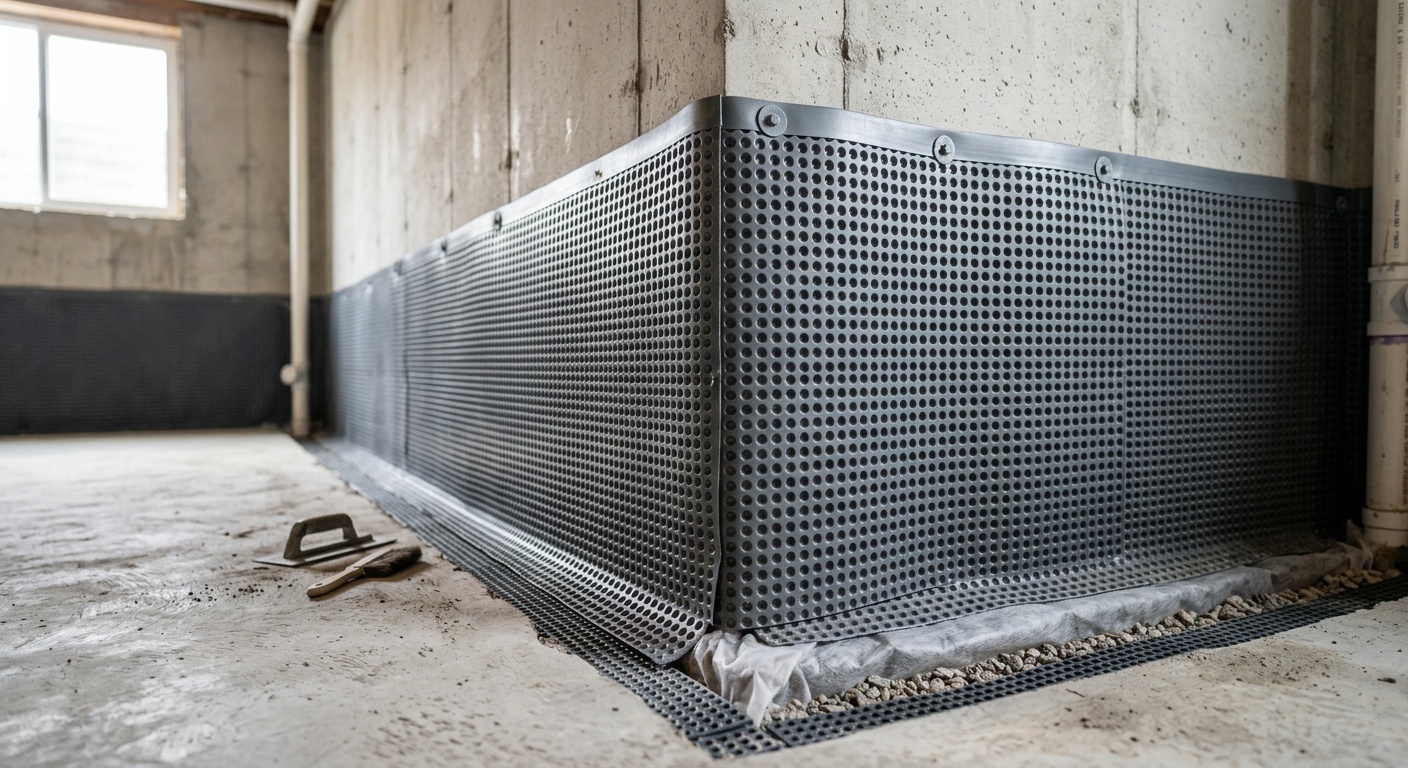
- Wall vapor barriers: Heavy-gauge plastic sheeting (typically 20 mil or thicker) is sealed to the foundation wall and directed into the drainage channel. This prevents wall seepage from reaching your floors and air space.
- Dehumidification: A properly sized whole-basement dehumidifier addresses condensation issues and maintains relative humidity below 50% — the threshold at which mold cannot thrive.
Cost range in 2026: $3,000 to $10,000 for a full interior drainage system including sump pump. Much more affordable than exterior systems, with significantly less disruption to your property.
Best situations for interior waterproofing:
- Water seeping through porous block walls (very common in homes built before 1980)
- Water entering at the cove joint (where the floor meets the wall)
- Situations where exterior excavation is impractical (narrow lots, attached structures, mature landscaping)
- Budget constraints that make exterior work prohibitive
- Homes that simply need moisture management, not structural repairs
Here’s the critical caveat: interior waterproofing does not address the root cause of water in your soil or stop water from entering your wall. If your foundation walls are deteriorating due to constant moisture exposure, interior drainage alone won’t halt that process. A structural assessment is essential when cracks, spalling, or wall movement are present.
Side-by-Side Comparison: Interior vs. Exterior Waterproofing
| Metric | Interior Waterproofing | Exterior Waterproofing |
|---|---|---|
| Average Cost (2026) | $3,000 – $10,000 | $8,000 – $20,000+ |
| Addresses Root Cause | No — manages water after entry | Yes — blocks water at the source |
| Disruption Level | Low – interior work only | High – excavation required |
| Protects Foundation Structure | Partially | Fully |
| Typical Warranty | 10–25 years (transferable) | 10–30 years (varies by product) |
Real-World Case Studies: Learning From Actual Homes
Case Study 1: The Chicago Bungalow That Needed Interior Solutions
In early 2025, a family in the Bridgeport neighborhood of Chicago discovered chronic seepage in their 1948 brick bungalow’s basement every spring. The water appeared consistently along two walls, always starting at the cove joint. The home sits on a narrow 25-foot lot with a neighboring structure 4 feet from the foundation wall — making excavation virtually impossible without removing the neighbor’s retaining wall.
A structural engineer confirmed the foundation walls showed no active cracking or movement — just chronic seepage through porous brick and mortar. The solution? A full interior drainage system: perimeter channel, dual sump pump with battery backup, and a wall vapor barrier system. Total investment: $6,800.
Result: The spring of 2026 brought above-average rainfall to the Chicago metro area. The basement stayed completely dry. The family is now finishing the basement as additional living space — something that would have been unthinkable before the waterproofing was complete. This is a textbook case where interior waterproofing was not just acceptable, but the only practical option.
Case Study 2: The Portland New Build That Got Exterior Right
A developer building a custom home in Portland’s West Hills in 2025 faced a challenging site: clay-heavy soil with a high seasonal water table and a sloped lot. Rather than opting for minimal builder-grade dampproofing (a simple asphalt coating), the architect specified a full exterior waterproofing system: crystalline membrane coating on the poured concrete foundation, a dimple drainage board, a footer drain connected to a daylight outlet 60 feet downhill, and proper grading.
Additional cost over basic dampproofing: approximately $12,000. This investment was made during construction, when the foundation was already exposed. The same work done after the fact would have cost four times as much and required destroying mature landscaping. The homeowners now have a fully finished lower level with zero moisture issues and a transferable 25-year warranty — a meaningful asset in the current Portland real estate market.
Common Challenges and How to Overcome Them
Challenge 1: Getting an Honest Assessment
Here’s a problem that nearly every homeowner faces: the contractor you call for a quote often specializes in just one method. An interior drainage company will find reasons why interior drainage is your solution. An excavation company will find reasons to dig. This isn’t necessarily dishonest — it’s human nature to see every problem through the lens of your available tools.
Solution: Before calling waterproofing contractors, invest $300–500 in an independent structural engineer assessment. Ask specifically for a written report identifying the water intrusion mechanism and recommended solutions. Armed with this independent opinion, you can evaluate contractor quotes with clear eyes. Many homeowners skip this step and end up paying for the wrong solution.
Challenge 2: The “Lifetime Warranty” Marketing Trap
Waterproofing companies are notorious for advertising “lifetime warranties” that sound more impressive than they are. In 2026, consumer protection agencies in multiple states have increased scrutiny of these claims following a spike in warranty disputes.
What to look for in a real warranty:
- Is it transferable to future homeowners? (This is crucial for resale value)
- What specifically does it cover — just the installed system, or water intrusion itself?
- What maintenance requirements could void coverage?
- What is the company’s financial stability? A warranty from a company that goes out of business is worthless.
Ask contractors directly: “If I get water intrusion in my basement two years from now, walk me through exactly what your warranty process looks like.” Their response will tell you everything.
Challenge 3: Grading and Surface Water — The Overlooked Factor
Many homeowners spend thousands on basement waterproofing while ignoring the most cost-effective fix available: correcting negative grading around the foundation. If your yard slopes toward your house, surface water is being directed directly at your foundation during every rain event.
For many homes with mild moisture issues, adding topsoil to create proper slope (6 inches of drop over the first 10 feet from the foundation) and extending downspout leaders 6–10 feet from the house resolves the problem completely — for a few hundred dollars. Always address surface drainage before investing in more extensive systems.
Data Visualization: Cost vs. Effectiveness by Method
The following chart illustrates approximate effectiveness ratings (based on independent contractor surveys and homeowner satisfaction data from 2025-2026) alongside average cost investment for common waterproofing approaches:
Waterproofing Method: Cost vs. Effectiveness (2026)
95% effective | ~$15,000
85% effective | ~$6,500
72% effective | ~$700
35% effective | ~$200
60% effective | ~$400
*Effectiveness ratings represent average outcomes when method is correctly matched to water intrusion type. Source: Compiled from contractor surveys and homeowner reports, 2025-2026.
Frequently Asked Questions
Can I combine interior and exterior waterproofing, and should I?
Absolutely — and in some situations, a combined approach is the most robust solution available. Homes with severe water table issues, structural cracks that allow direct water entry, and high-value finished basements can benefit enormously from exterior protection (stopping water at the source) combined with an interior drainage system (catching anything that gets through). This belt-and-suspenders approach is recommended for homes in flood-prone zones, properties with a history of significant water damage, or anywhere the cost of water intrusion to finished spaces is very high. That said, most homes don’t require both systems. If your budget is limited, prioritize the method best matched to your specific intrusion mechanism — that will deliver far better results than a partial version of each.
Will waterproofing my basement increase my home’s resale value?
Yes, though the return on investment varies by method and market. According to real estate data compiled through early 2026, homes with documented, warrantied waterproofing systems sell faster and with fewer inspection-related negotiation issues than comparable homes without them. Interior drainage systems with transferable warranties typically recover 50–70% of their cost in added resale value, while exterior waterproofing with documented professional installation can recover 60–80%. More importantly, the absence of waterproofing — particularly if a home has documented moisture history — can reduce a sale price by $10,000 to $30,000 or trigger mandatory remediation before closing. The math often strongly favors addressing moisture issues proactively before listing.
How do I know if I need waterproofing or just better ventilation and dehumidification?
This is one of the most important and most frequently confused distinctions in basement moisture management. Use the plastic sheeting test described earlier in this article to determine whether moisture is coming through your walls or forming as condensation from interior air. If condensation is your primary issue, a properly sized dehumidifier (aim for 70-pint capacity for a typical basement, running to maintain 45-50% relative humidity) and improved ventilation may solve your problem entirely — without any structural work. However, if the test reveals water seeping from outside, dehumidification alone will never fully resolve the issue. It will only manage humidity after water has already entered. In 2026, many homeowners are combining smart humidity monitoring devices (connected sensors that track basement conditions continuously) with their waterproofing systems to maintain optimal conditions and catch developing issues early.
Your Dry Basement Decision Roadmap
You now have a clearer picture than most homeowners ever get before making this critical decision. Let’s turn that knowledge into action with a concrete sequence of steps tailored to where you are right now.
Step 1: Diagnose before you spend a dollar on contractors. Run the plastic sheeting test. Check your downspouts and grading. Look for efflorescence (white mineral deposits on walls — a clear sign of chronic water movement through masonry). Document everything with photos and note when and where moisture appears.
Step 2: Hire an independent structural engineer if any cracks or wall movement are present. This $300–500 investment protects you from thousands in misdirected spending. Ask for a written report specifying the intrusion mechanism and recommended solutions.
Step 3: Fix the free stuff first. Extend downspouts, regrade if needed, and clean gutters. For a meaningful percentage of homes, these basic corrections significantly reduce or eliminate the problem.
Step 4: Get three quotes — but from contractors who offer different methods. Don’t get three quotes from interior drainage companies only. Ensure you’re seeing multiple perspectives on your specific situation.
Step 5: Evaluate warranties with the scrutiny of a lawyer. Ask every question outlined in this article. A warranty is only as good as the company backing it.
Here’s the broader truth worth sitting with: as climate patterns continue shifting in 2026 and beyond, extreme precipitation events are becoming more frequent across virtually every region of North America. The Federal Emergency Management Agency reported in 2025 that water-related home damage claims increased 23% over the prior five-year period. Addressing foundation moisture isn’t just about comfort today — it’s about protecting an asset that likely represents the single largest investment of your life against a risk that’s genuinely growing.
You’ve read the guides, you understand the options — now the question is: what does the water in your specific home actually tell you about where that moisture is coming from? The answer to that question is the answer to everything else.