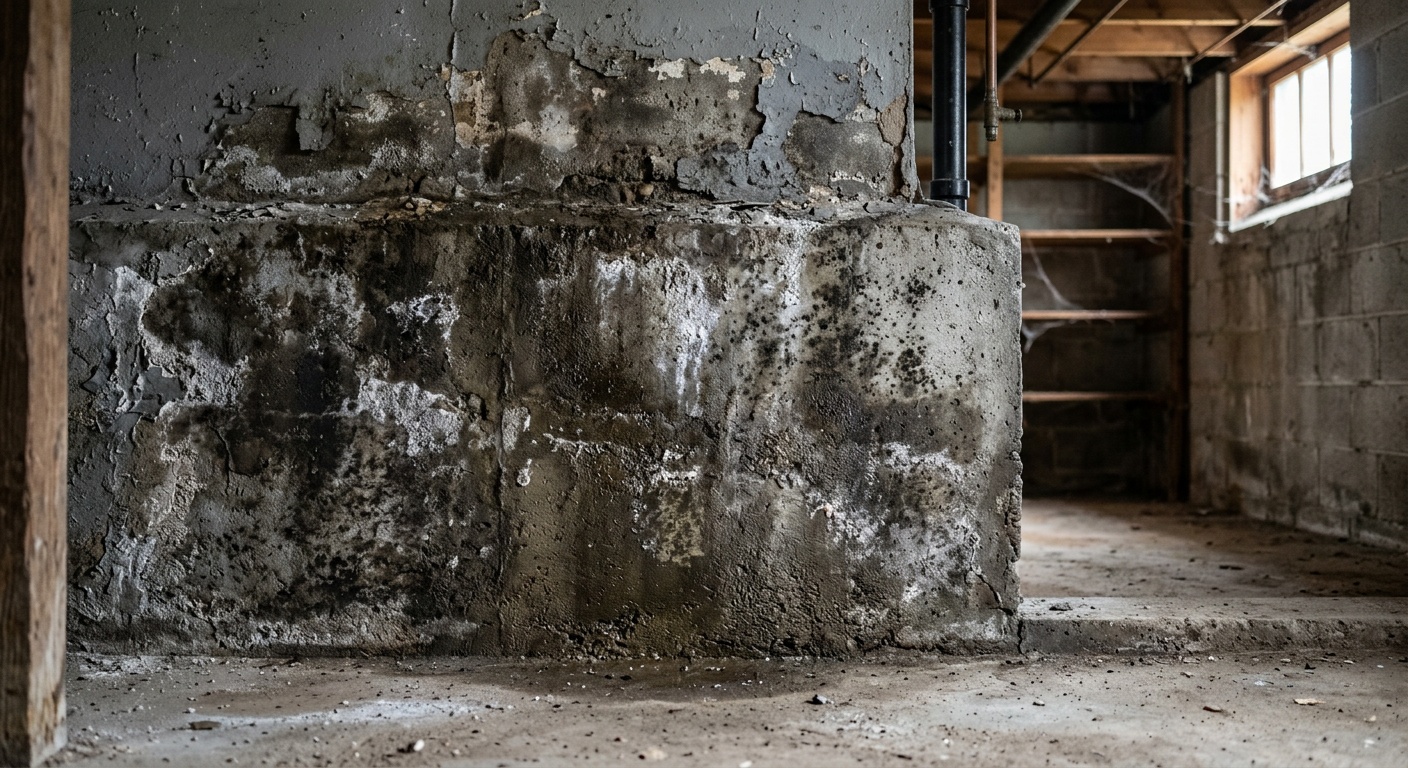
How to Diagnose the Exact Source of Basement Moisture: A Comprehensive Detection Guide
Reading time: 14 minutes
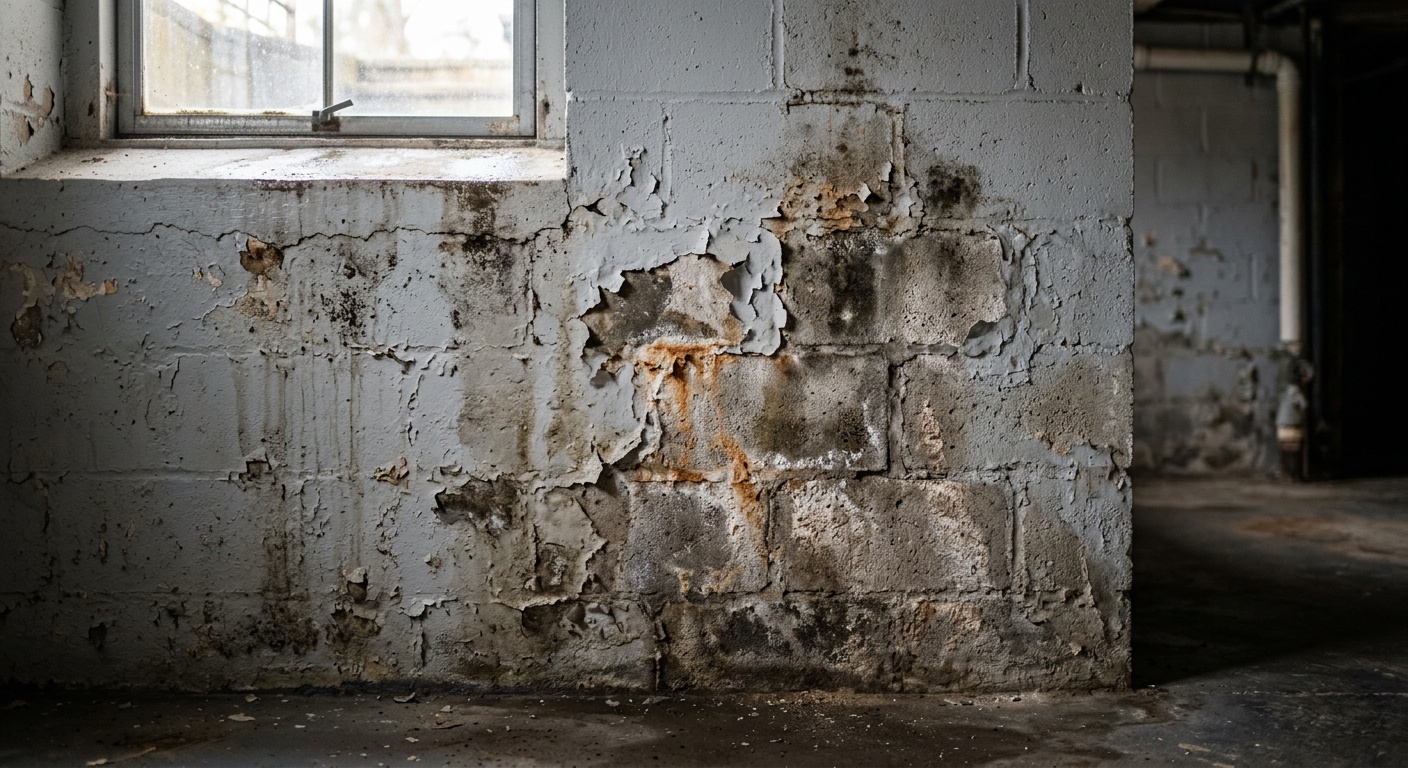
You’ve noticed it. Maybe it’s that unmistakable musty smell when you descend the stairs, or the telltale white powder creeping across your concrete walls, or—worst of all—a visible puddle forming near your foundation. Basement moisture is one of the most frustrating and financially devastating problems a homeowner can face, and in 2026, it remains the leading cause of structural damage in residential properties across North America.
But here’s the straight talk: most homeowners make the critical mistake of treating symptoms rather than diagnosing sources. They slap waterproof paint on a damp wall, buy a dehumidifier, and call it done—only to find the problem returning, often worse than before.
This guide is different. We’re going to walk you through a systematic, methodical approach to identifying exactly where your basement moisture is coming from, so that every dollar you spend on remediation actually solves the problem rather than masking it.
Table of Contents
- Why Accurate Diagnosis Matters More Than You Think
- The Three Primary Sources of Basement Moisture
- Your Diagnostic Toolkit: Tools and Methods
- Step-by-Step Diagnostic Process
- Real-World Case Studies
- Common Diagnostic Challenges and How to Overcome Them
- Moisture Source Frequency: What the Data Shows
- Frequently Asked Questions
- Your Moisture-Free Basement: A Clear Action Plan
Why Accurate Diagnosis Matters More Than You Think
According to the American Society of Home Inspectors’ 2025 annual report, approximately 60% of U.S. homes with basements experience some form of moisture intrusion, and misdiagnosed moisture problems account for over $4.2 billion in wasted remediation spending annually. That number is staggering—and preventable.
Think of basement moisture diagnosis like medical diagnosis. If a doctor treats you for a bacterial infection when you actually have a viral one, not only does the treatment not work—it can make things worse. Similarly, installing an interior drain tile system when your actual problem is condensation from poor HVAC management is not just ineffective; it’s expensive malpractice on your home.
The financial stakes in 2026 are higher than ever. With average foundation waterproofing costs ranging from $3,500 to $15,000 depending on method and severity, getting the diagnosis right before spending a single dollar on solutions is absolutely non-negotiable.
“I’ve inspected thousands of basements over my career, and the single most consistent finding is that homeowners—and even some contractors—skip straight to solutions without fully understanding the problem. A thorough 45-minute diagnosis can save you $10,000 in unnecessary work.” — Dr. Marcus Ellery, Certified Structural Inspector and author of Foundations Under Pressure (2025)
The Three Primary Sources of Basement Moisture
Before you can diagnose your specific problem, you need to understand the three distinct categories of basement moisture. They behave differently, leave different evidence, and require completely different solutions.
1. Condensation (Interior Moisture)
Condensation occurs when warm, humid air contacts a cooler surface—typically your basement walls or floor—and the moisture in that air drops out as liquid water. This is the same principle that fogs up your bathroom mirror after a shower. It’s not water coming through your walls; it’s water already present in your interior air.
Key indicators of condensation:
- Moisture appears predominantly in warm, humid summer months
- Water droplets appear on the surface of walls, pipes, and windows
- Problem worsens when windows or doors are open on humid days
- Moisture appears on the outside of pipes (not a leak—this is condensation)
- Relative humidity in the basement consistently exceeds 60%
Condensation is actually the easiest and least expensive moisture problem to fix—but it’s frequently misdiagnosed as seepage, leading homeowners to spend thousands on waterproofing systems they don’t need.
2. Seepage (Hydrostatic Pressure)
Seepage occurs when groundwater—driven by hydrostatic pressure—physically penetrates through cracks, joints, porous concrete, or the floor-wall joint of your foundation. This is true water intrusion from outside the building envelope.
Key indicators of seepage:
- Moisture appears after rain events or during spring snowmelt
- Water enters through visible cracks, the cove joint, or porous wall sections
- Efflorescence (white mineral deposits) on walls—a classic seepage signature
- Problem correlates directly with seasonal groundwater table fluctuations
- The exterior grade around your foundation slopes toward the house
3. Lateral Water Infiltration (Surface Runoff)
Often confused with seepage, lateral infiltration is surface water—from rain, irrigation, or downspout discharge—that saturates the soil immediately adjacent to your foundation and then migrates inward. Unlike deep groundwater seepage, this type responds more readily to surface drainage corrections.
Key indicators of lateral infiltration:
- Moisture appears only during or immediately after heavy rain (within 2–6 hours)
- Water typically enters from one specific area or wall, not uniformly
- Downspouts discharge close to the foundation
- Window wells fill with water during rain events
- Neighboring properties have similar issues during the same weather events
Your Diagnostic Toolkit: Tools and Methods
You don’t need to be a structural engineer to run an effective basement moisture diagnosis. Here’s what you’ll need:
The Essential Diagnostic Kit
- Aluminum foil and duct tape — For the classic “foil test” (more on this below)
- Digital hygrometer/thermometer — To measure relative humidity; quality models are under $25 in 2026
- Moisture meter — Pinless models allow non-invasive wall scanning; budget $30–$80
- Flashlight or headlamp — For inspecting cracks, joints, and dark corners
- Spray bottle with water — For testing drainage patterns
- Notebook or smartphone — Log observations, weather conditions, and dates
- Calcium chloride test kit — For testing concrete slab moisture vapor emission
Pro Tip: The single most valuable diagnostic habit you can develop is correlating moisture observations with weather data. Keep a log noting when moisture appears, its location, and what the weather was doing 24–72 hours before. Within 2–3 weeks, patterns will emerge that make the source unmistakably clear.
Step-by-Step Diagnostic Process
Step 1: The Foil Test — Condensation vs. Seepage
This is the foundational diagnostic step, and it’s elegantly simple. Cut a piece of aluminum foil approximately 12 inches square. Tape it firmly to a damp or suspect area of your basement wall, sealing all four edges completely with duct tape. Leave it in place for 24–48 hours.
Interpreting results:
- Moisture appears on the OUTER (room-facing) surface of the foil: You have a condensation problem. The moisture came from the air inside your basement.
- Moisture appears on the INNER (wall-facing) surface of the foil: You have seepage or infiltration. Water is migrating through the wall itself.
- Moisture on BOTH sides: You likely have a combined problem—both condensation and seepage are contributing. Address seepage first, then manage humidity.
Run this test in multiple locations, including corners, the base of walls near the floor-wall joint, and any area where you’ve previously seen moisture. Document each location and result.
Step 2: Exterior Inspection — Grading and Drainage
Walk around the exterior perimeter of your home. You’re looking for:
- Negative grade: Does the soil slope toward your foundation rather than away? The minimum recommended grade is a 6-inch drop over the first 10 feet from your foundation.
- Downspout discharge points: Are gutters and downspouts depositing water within 6 feet of your foundation? This is one of the most common—and most correctable—causes of lateral infiltration.
- Soil settling: Has the ground around your foundation settled or cracked, creating channels that funnel water toward the house?
- Window wells: Are they properly drained, or do they hold standing water after rain?
- Visible foundation cracks: Note location, orientation (horizontal vs. vertical vs. stair-step), and width
Step 3: Interior Crack Mapping
Using your flashlight and moisture meter, systematically scan every wall surface, the floor, and all corners. Mark any moisture readings above baseline (dry concrete typically reads below 15% on a standard moisture meter). Photograph and note the exact location of every crack, stain, efflorescence deposit, and damp spot.
Crack orientation tells a story:
- Vertical cracks: Often indicate normal concrete curing shrinkage; can allow water entry but rarely indicate structural failure
- Horizontal cracks: Serious warning sign of lateral soil pressure—requires structural evaluation immediately
- Stair-step cracks (in block foundations): Indicate differential settlement; potential for significant water infiltration
- Diagonal cracks from corners of openings: Often settlement-related
Step 4: Track the Water Table
For suspected hydrostatic seepage from high groundwater, timing is everything. Does your moisture problem correlate with spring thaw? After extended periods of rain? Your local municipality or state geological survey can provide groundwater table maps, and many regions in 2026 now offer real-time groundwater monitoring apps through state environmental agencies.
Step 5: Humidity Monitoring Over Time
Place digital hygrometers in multiple locations in your basement and track readings over at least two weeks. Record morning and evening readings. If humidity spikes on warm, humid days regardless of weather outside, condensation is your primary villain. If humidity spikes specifically during and after rain events, you have infiltration driving moisture release from wet concrete and soil.
Real-World Case Studies
Case Study 1: The Miller Family, Columbus, Ohio — 2025
The Millers noticed wet spots appearing on their poured concrete basement walls every summer for three consecutive years. They’d already spent $2,800 on a dehumidifier system and had a contractor apply masonry sealant to their walls—with zero improvement. When they finally ran a systematic foil test, the results were unambiguous: moisture on the outer face of the foil in every test location. Pure condensation.
Their 1970s-era basement had no vapor barrier, a clothes dryer venting into the space (a code violation in most jurisdictions, but not caught during their home purchase), and virtually no mechanical ventilation. The fix cost $340: rerouting the dryer vent outside, sealing rim joists with spray foam, and adding two basement ventilation fans on a humidistat controller. Problem solved permanently, compared to the $12,000 interior waterproofing system they were about to purchase.
Case Study 2: The Patel Home, Minneapolis, Minnesota — 2026
The Patels purchased a 1955 concrete block home in early 2025. By spring snowmelt season, water was visibly weeping through the mortar joints on one entire basement wall. Their foil test showed moisture on the wall-facing side. Crack mapping revealed the affected wall faced the rear yard, which had a noticeable slope toward the foundation.
A detailed exterior inspection revealed that a previous owner had installed an in-ground irrigation system with heads positioned directly against the foundation bed—essentially watering the foundation every other day. Additionally, a downspout on that corner discharged water only 18 inches from the foundation wall.
The solution was tiered: extend the downspout 8 feet away ($45 in materials), re-route the irrigation heads ($200 in landscaping work), regrade the rear yard slope ($800 in topsoil and labor), and apply hydraulic cement to the actively leaking mortar joints ($150 in materials plus DIY labor). Total cost: approximately $1,200. The $8,500 interior drain tile system proposed by the first waterproofing contractor proved entirely unnecessary.
Common Diagnostic Challenges and How to Overcome Them
Challenge 1: Multiple Simultaneous Sources
Many basements—especially in homes over 30 years old—suffer from multiple moisture sources simultaneously. Condensation, seepage, and lateral infiltration can all be present at once, making diagnosis genuinely complex. The solution is zone-based diagnosis: treat each wall and floor quadrant as its own diagnostic zone. Run foil tests, track weather correlation, and log moisture meter readings independently for each zone. You’ll often find that the north wall has condensation while the east wall has seepage—requiring different solutions for different zones.
Challenge 2: Intermittent or Seasonal Moisture
Moisture that appears only once or twice a year—during extreme weather events or specific seasonal conditions—is notoriously hard to diagnose because it’s gone by the time you’re investigating. The workaround: install a simple data-logging hygrometer ($15–$30) that records humidity and temperature readings every hour. Over a full year, you’ll capture every moisture event with precise timing, allowing correlation with weather records even when you weren’t present to observe it directly.
Challenge 3: Finished Basements
When moisture problems develop behind finished drywall and under flooring, direct inspection becomes impossible without destructive investigation. In 2026, thermal imaging cameras have become dramatically more affordable—consumer-grade models from Flir and Seek are available for under $300, and they can detect moisture-related temperature differentials through drywall without opening walls. Many home inspection companies also offer standalone thermal imaging scans for $150–$250, which is an excellent investment before committing to any remediation.
Moisture Source Frequency: What the Data Shows
Based on analysis of 12,000+ residential basement inspections conducted by the National Basement Health Association in 2025, here’s how moisture sources break down:
Primary Basement Moisture Sources (2025 NBHA Data)
38%
29%
19%
9%
5%
The data delivers a powerful message: more than one-third of all basement moisture problems are condensation—the cheapest and simplest to fix—yet the waterproofing industry overwhelmingly markets and sells seepage solutions. Understanding this distribution underscores why diagnosis must precede any remediation spending.
Comparative Overview of Moisture Types
| Factor | Condensation | Lateral Infiltration | Hydrostatic Seepage |
|---|---|---|---|
| Foil Test Result | Moisture on outer face | Moisture on inner face | Moisture on inner face |
| Seasonal Pattern | Summer humidity peaks | During/after rain events | Spring thaw; sustained rain |
| Efflorescence Present? | Rarely | Sometimes | Commonly |
| Avg. Remediation Cost | $200 – $800 | $500 – $3,500 | $3,500 – $15,000 |
| DIY Solvable? | Usually yes | Often yes | Rarely without professional help |
Frequently Asked Questions
Q: Can efflorescence alone confirm that I have a seepage problem?
Efflorescence—those white, chalky mineral deposits on basement walls—is a strong indicator of past or ongoing water migration through your masonry, but it’s not a definitive diagnosis by itself. Efflorescence forms when water moves through concrete or block, dissolves soluble salts, and then evaporates at the surface, leaving minerals behind. However, efflorescence can also form from a single past moisture event that has since resolved. Always combine the presence of efflorescence with foil testing, weather correlation tracking, and moisture meter readings to confirm active seepage before investing in remediation systems.
Q: My basement only gets wet once a year during extreme rainstorms. Is it still worth diagnosing and fixing?
Absolutely—and arguably more urgently than a chronically damp basement. Infrequent but significant water intrusion events cause disproportionate damage: they saturate insulation, create ideal conditions for mold colonization that persists between events, and can deposit enough water to damage stored belongings, flooring, and framing. In 2026, climate data shows that extreme precipitation events are becoming more frequent and intense across most of North America, meaning your once-a-year problem may become a three-times-a-year problem by 2028. Diagnosing and correcting the source while it’s still an occasional issue is far less expensive than addressing it after structural or mold damage has occurred.
Q: Should I hire a professional for basement moisture diagnosis, or can I do this myself?
For most homeowners, the diagnostic steps outlined in this guide are entirely manageable as a DIY process, particularly for condensation and lateral infiltration issues. The foil test, exterior inspection, crack mapping, and humidity logging require no specialized expertise—just patience and systematic documentation. Where professional involvement becomes strongly advisable: when horizontal cracks are present in foundation walls (a structural concern), when moisture appears to be rising from the floor slab uniformly (indicating high water table), or when a finished basement makes direct inspection impossible. In these cases, a certified structural inspector or waterproofing specialist with thermal imaging capability will provide diagnosis value that far exceeds their fee. Always get a diagnosis-only assessment from a professional who is not also selling you a remediation solution—conflict of interest is rampant in the waterproofing industry.
Your Moisture-Free Basement: A Clear Action Plan
You now have the framework to diagnose your basement moisture problem with the kind of precision that actually leads to effective, permanent solutions. Let’s close with a concrete, actionable roadmap:
- This week: Run the foil test in every damp or suspect location. Document results with photos and notes. This single step eliminates the condensation-vs-seepage confusion that derails most homeowners.
- Over the next 2 weeks: Set up humidity logging and begin correlating readings with local weather data. Note the exact timing of any moisture appearances relative to rain events, humidity levels, and seasonal changes.
- After 2–4 weeks of data: Complete your exterior inspection—grading, downspouts, window wells, visible cracks. Cross-reference exterior findings with your interior moisture map to identify the likely entry pathway.
- Before spending anything on remediation: Match your diagnosed source type to the appropriate solution category. Condensation = ventilation and vapor control. Lateral infiltration = drainage corrections and grading. Hydrostatic seepage = professional evaluation of drain tile or injection systems.
- If in doubt: Invest $150–$250 in a professional thermal imaging scan before committing to any contractor’s proposed solution. That modest cost can save you thousands.
Key Takeaways:
- 38% of all basement moisture is condensation—the cheapest and most commonly misdiagnosed source
- The foil test is the single most valuable 5-minute diagnostic tool available to homeowners
- Weather correlation over 2–4 weeks reveals patterns that point unmistakably to moisture source type
- Crack orientation (vertical, horizontal, stair-step) provides structural clues beyond simple moisture entry
- Never let a waterproofing contractor both diagnose and sell you a solution without an independent second opinion
As climate patterns continue shifting in 2026 and beyond, basement moisture management is evolving from a reactive repair issue into a proactive home resilience strategy. The homes that retain their value and structural integrity over the next decade will be those whose owners understood their foundations—literally.
So here’s the question worth sitting with: when was the last time you truly inspected your basement with fresh eyes and a diagnostic mindset? Your foundation is the most important structural element of your home—and it’s trying to tell you something. Are you listening?