Best Drainage Systems to Keep Your Basement Permanently Dry
Reading time: 12 minutes
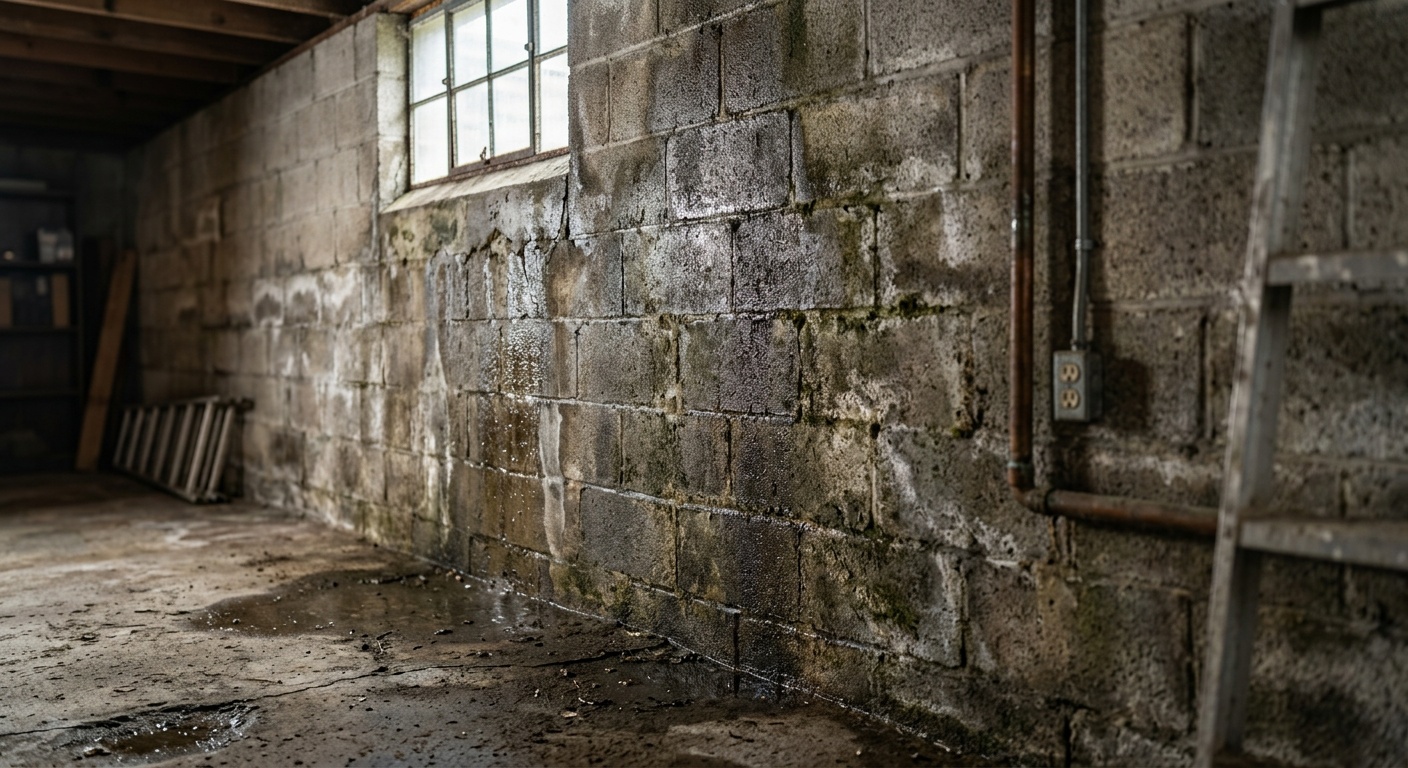
Water in your basement isn’t just an inconvenience — it’s a ticking clock. Every hour that moisture sits against your foundation, it’s silently eating away at structural integrity, inviting mold colonies, and quietly decimating your home’s resale value. If you’ve ever walked downstairs to find a puddle greeting you like an unwanted houseguest, you already know the sinking feeling that comes with it.
Here’s the straight talk: A wet basement isn’t a design flaw you simply live with. It’s an engineering problem with proven, permanent solutions. The right drainage system doesn’t just manage water — it defeats it, redirecting moisture before it ever gets the chance to cause damage.
In 2026, with increasingly unpredictable precipitation patterns and aging housing stock across North America and Europe, basement waterproofing has moved from a luxury upgrade to a genuine necessity. According to the Water Quality & Health Council’s 2025 Housing Report, approximately 98% of homes with basements will experience some form of water intrusion during their lifetime — and over 60% of those cases lead to documented mold growth within 48 hours of moisture exposure.
This guide will walk you through the best drainage systems available today, how to choose the right one for your specific situation, and what it actually costs to get it done right. Let’s turn your soggy basement challenge into a strategic, dry-basement victory.
Table of Contents
- Why Basements Flood: The Root Causes
- Types of Basement Drainage Systems Explained
- Interior vs. Exterior Drainage: Which Wins?
- The Sump Pump: Your Drainage System’s Engine
- Cost Comparison and ROI
- Real-World Case Studies
- Installation Tips and Common Mistakes
- Frequently Asked Questions
- Your Dry Basement Action Plan
Why Basements Flood: The Root Causes
Before you invest in any drainage solution, you need to understand why water is getting in. Treating symptoms without diagnosing the source is how homeowners end up spending money twice — or three times.
The Three Primary Culprits
Water intrusion in basements generally falls into three categories, and your drainage strategy needs to match the source:
- Hydrostatic Pressure: When soil surrounding your foundation becomes saturated, it exerts enormous lateral pressure against your basement walls. This pressure literally forces water through microscopic cracks in concrete block or poured concrete walls. It’s the most common cause and the most misunderstood.
- Surface Water Infiltration: Poor grading around your home allows rainwater to pool against the foundation rather than drain away. Clogged gutters and downspouts that discharge too close to the structure compound the problem dramatically.
- Groundwater Table Rise: In regions with high water tables — increasingly common in 2026 as climate patterns shift — seasonal groundwater rise can push moisture up through floor joints and wall-floor seams. This type of intrusion is often confused with plumbing leaks.
Quick diagnostic tip: Tape a sheet of aluminum foil to your basement wall with duct tape, sealing all four edges. Leave it for 24 hours. If the outer surface is damp, you have condensation issues (a ventilation problem). If moisture appears behind the foil against the wall, you have active water intrusion that requires drainage solutions.
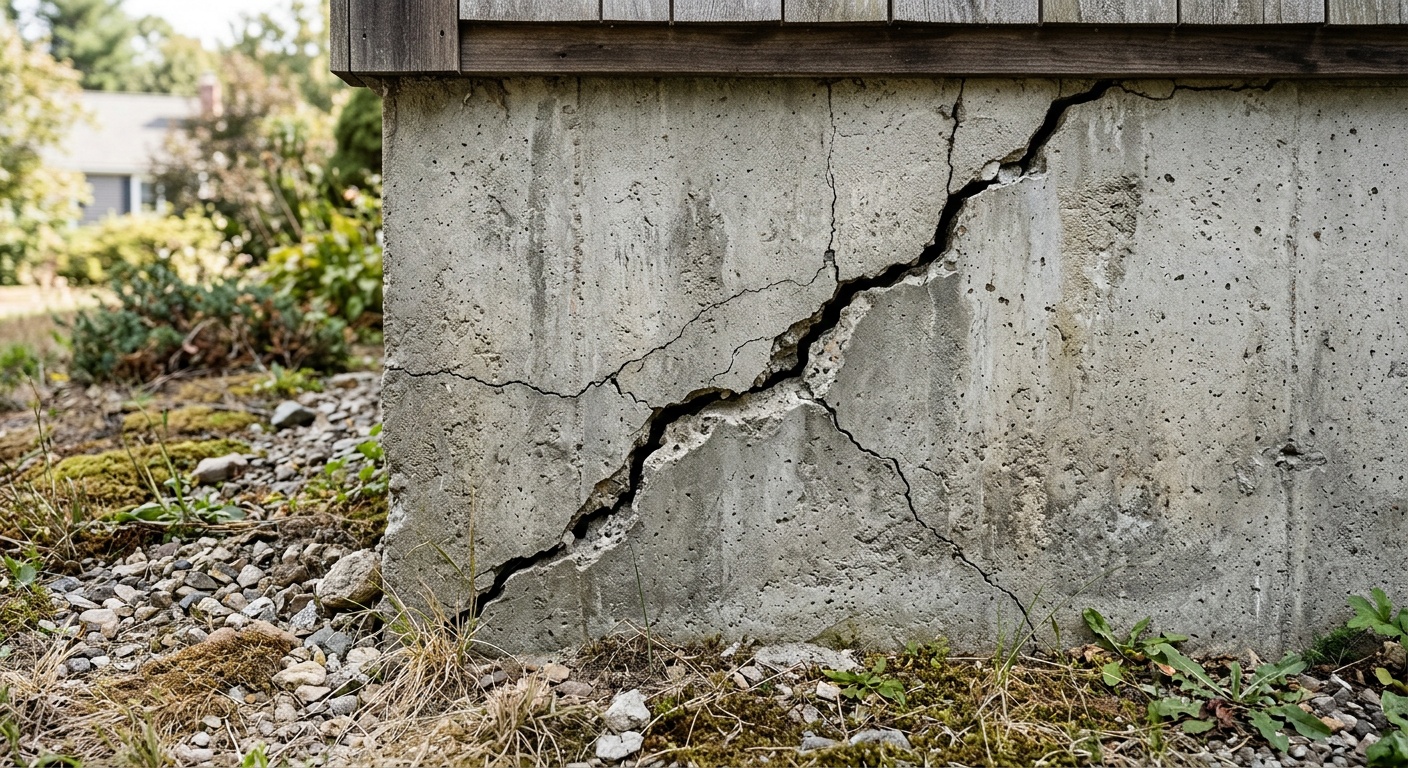
The Hidden Cost of Ignoring the Problem
A study published in the Journal of Building Pathology and Rehabilitation (2025) found that homeowners who delayed basement waterproofing for more than two years saw their remediation costs increase by an average of 340%. Foundation repair after prolonged water damage can run into six figures, making early intervention one of the highest-ROI home maintenance decisions you can make.
Types of Basement Drainage Systems Explained
There is no one-size-fits-all drainage system. The ideal solution depends on your basement’s construction, soil composition, water intrusion pattern, and budget. Here’s a comprehensive breakdown of your primary options.
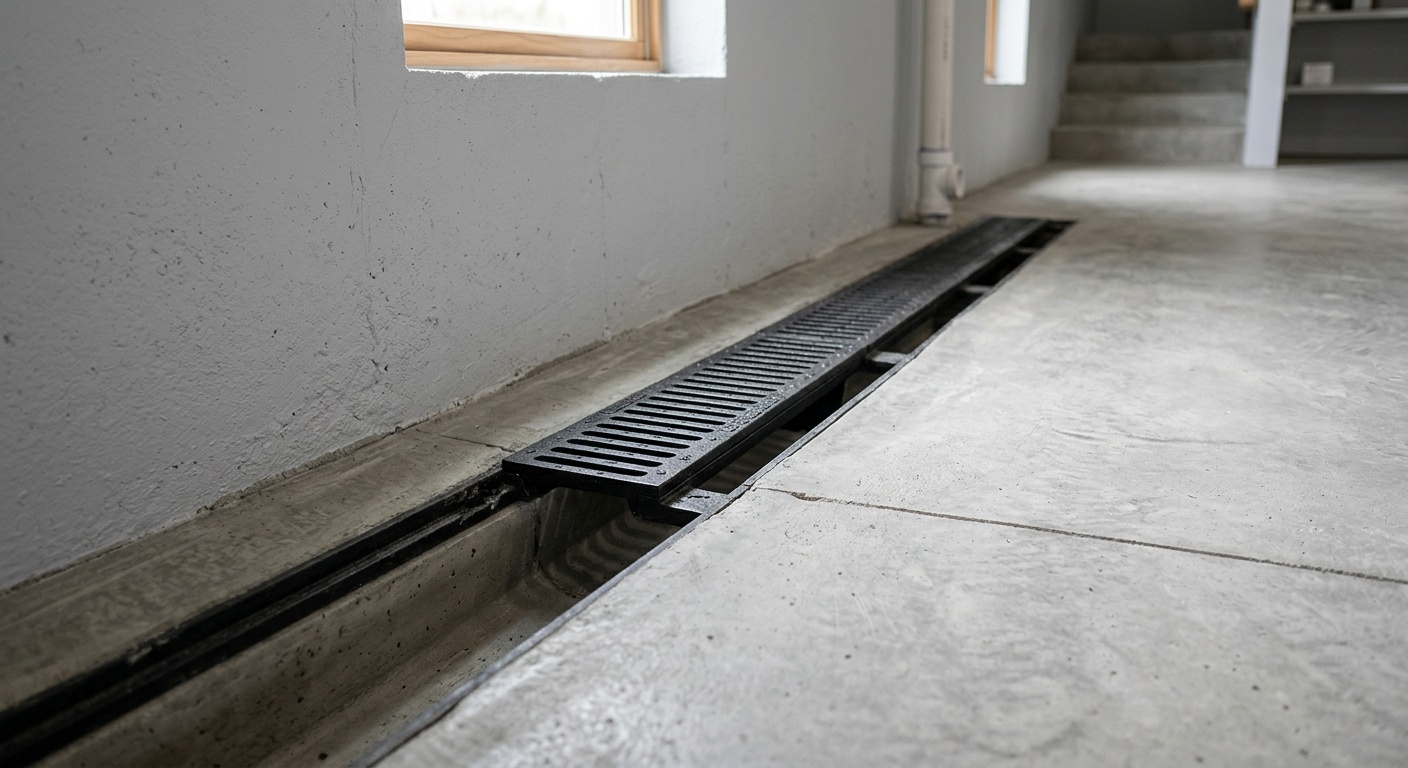
1. Interior French Drain (Interior Perimeter Drain System)
The interior French drain is widely considered the gold standard for existing homes dealing with water intrusion. A channel is cut along the perimeter of the basement floor (at the wall-floor joint), a perforated pipe is installed at the base of the footing, and the channel is filled with gravel and concrete. Water that enters through the walls or floor is captured and directed to a sump pit, where a pump expels it away from the structure.
Best for: Existing homes with chronic water intrusion, hydrostatic pressure issues, homes in regions with high water tables.
Average cost in 2026: $5,000–$15,000 depending on basement size and regional labor rates.
2. Exterior French Drain (Curtain Drain)
Installed outside the foundation, this system intercepts groundwater before it reaches your walls. A trench is dug around the perimeter of the home, a perforated pipe wrapped in filter fabric is placed at the footing level, and the trench is backfilled with gravel. Water is redirected away from the structure via gravity or to a collection point.
Best for: New construction, homes with significant surface water problems, properties on sloped lots.
Average cost in 2026: $8,000–$25,000+ due to excavation requirements.
3. Drain Tile Systems
Drain tile — despite the name — is a perforated pipe system, not actual tile. Modern drain tile systems use flexible PVC or HDPE perforated pipe installed either at the footing level (exterior) or along the interior perimeter (interior). This system has evolved significantly and remains a favorite among professional waterproofers for its longevity and reliability.
Best for: Both new construction and retrofits; particularly effective in clay-heavy soils that retain water.
4. Channel Drain Systems (Surface Drains)
If your basement has a walk-out or receives water primarily through floor drains, channel drains — linear drains set into the floor surface — can capture runoff at the point of entry. These are often used in combination with perimeter systems rather than as standalone solutions.
5. Gravity-Fed Drainage Systems
In homes where the basement floor sits above the municipal sewer line or a natural grade drop, a gravity-fed system can discharge collected water without a sump pump. While less common in 2026’s dense urban environments, this no-mechanical approach offers long-term reliability since there are no mechanical components to fail.
Interior vs. Exterior Drainage: Which Wins?
This is the debate that divides waterproofing professionals. Here’s a balanced view.
Exterior systems address water at the source — they intercept moisture before it reaches the foundation. In theory, this is the cleanest solution. In practice, exterior systems require major excavation (meaning landscaping destruction, significant labor costs, and in many cases, structural disruption). They’re most cost-effective when done during new construction or major renovations.
Interior systems don’t stop water from entering the walls — they manage it before it can cause damage. Critics argue this is treating symptoms rather than causes. But in reality, interior perimeter drainage systems are highly effective for the vast majority of residential basement situations and cost considerably less to install in existing homes. Many waterproofing engineers argue that the best outcomes come from combining both approaches.
Pro Tip: When getting contractor quotes, be wary of companies that push exclusively one approach without a proper assessment. A reputable waterproofing firm should conduct a moisture mapping evaluation before recommending any system.
The Sump Pump: Your Drainage System’s Engine
No interior drainage system functions without its most critical component: the sump pump. Positioned in a pit (the sump basin) at the lowest point of your basement, the sump pump activates automatically when water reaches a set level, expelling collected water away from the foundation via a discharge pipe.
Types of Sump Pumps
- Submersible Sump Pumps: Installed inside the pit, submerged in water. Quieter, more powerful, and better suited for high-volume water situations. Most professionals recommend these for primary systems.
- Pedestal Sump Pumps: The motor sits above the pit. Easier to service but noisier and less powerful. Better for lighter-duty applications.
- Battery Backup Sump Pumps: Critical for storm situations when power outages coincide with heavy rainfall — precisely when you need your pump most. In 2026, with grid reliability concerns in many regions, a battery backup system is no longer optional — it’s essential.
- Water-Powered Backup Pumps: Use municipal water pressure as power. No batteries required, but they discharge water to drain water, which can be costly and is restricted in some municipalities.
Sump Pump Capacity: Getting the Math Right
Sump pump capacity is measured in gallons per hour (GPH) or gallons per minute (GPM). Most residential applications require between 1,800–2,400 GPH. Here’s a quick rule of thumb: your pump should be able to handle your basement’s maximum expected water volume with at least 30% capacity to spare. Undersizing is one of the most common — and costly — mistakes homeowners make.
In 2026, smart sump pump systems with Wi-Fi monitoring have become increasingly affordable (starting around $200 for the monitoring module). These systems alert you via smartphone when the pump activates, when water levels rise abnormally, or when the pump is nearing failure — giving you advance warning before disaster strikes.
Cost Comparison and ROI
Drainage System Comparative Overview
| Drainage System | Avg. 2026 Cost | Effectiveness | Disruption Level | Lifespan |
|---|---|---|---|---|
| Interior French Drain | $5,000–$15,000 | ⭐⭐⭐⭐⭐ | Low–Moderate | 25–50 years |
| Exterior French Drain | $8,000–$25,000+ | ⭐⭐⭐⭐⭐ | High | 30–50 years |
| Drain Tile System | $4,000–$12,000 | ⭐⭐⭐⭐ | Low–Moderate | 20–40 years |
| Channel/Surface Drain | $800–$3,500 | ⭐⭐⭐ | Low | 15–25 years |
| Gravity-Fed System | $3,000–$10,000 | ⭐⭐⭐⭐ | Moderate | 40+ years |
Effectiveness Ratings: A Visual Comparison
Based on contractor surveys and homeowner satisfaction data compiled by the National Waterproofing & Drainage Institute (2025), here’s how systems rate for long-term water control effectiveness:
93%
90%
81%
78%
62%
ROI Reality Check: The National Association of Realtors’ 2025 Cost vs. Value Report found that basement waterproofing delivers an average return of 78 cents for every dollar invested at resale — one of the highest ROI figures in home improvement. In flood-prone markets like Houston, Chicago, and the Mid-Atlantic corridor, that figure climbs to over 90 cents on the dollar.
Real-World Case Studies
Case Study 1: The Chicago Townhome (Interior Perimeter System)
The Kowalski family in Chicago’s Lincoln Square neighborhood had lived with seasonal basement flooding for eleven years. Every spring, 2–4 inches of water would accumulate in their 1,100 square foot unfinished basement, driven by clay-heavy soil that retained snowmelt and spring rainfall. Their previous approach — a single pedestal sump pump installed in 2018 — was overwhelmed every year.
In April 2025, they contracted a waterproofing company to install a full interior French drain system: 140 linear feet of perimeter channel drain, two submersible sump pumps with battery backup, and a wall drainage panel system (dimple mat) across all masonry walls.
Total cost: $12,400. After the spring 2026 season — which brought record rainfall in the Chicago metro — their basement remained completely dry. They subsequently finished the space, adding approximately $38,000 in finished square footage value to their home. Net gain: $25,600.
Case Study 2: The Pacific Northwest New Build (Exterior + Interior Hybrid)
A contractor in the Portland, Oregon area building a custom home in 2025 opted for a comprehensive hybrid system from the ground up. The exterior system included a waterproofing membrane applied to the foundation walls, a drainage board, and a perforated pipe system at the footing that daylighted to a French drain in the rear yard. Interior, they installed a drain tile system connecting to a single high-capacity sump pump as a failsafe.
Additional cost over standard construction: $18,200. The home’s appraiser noted the system as a significant value-add given Portland’s notoriously wet climate, and the home sold in early 2026 at $31,000 over asking price — with the waterproofing system specifically highlighted in the listing as a premium feature.
Installation Tips and Common Mistakes to Avoid
Whether you’re hiring a contractor or exploring DIY options for minor components, understanding the installation process helps you make smarter decisions and avoid costly errors.
Hiring the Right Contractor
This is where many homeowners stumble. The basement waterproofing industry has a higher concentration of unscrupulous contractors than almost any other home improvement sector. Here’s your vetting framework:
- Demand a written, transferable warranty. Reputable companies offer 25-year or lifetime warranties on their interior drainage systems. Make sure the warranty is transferable to future homeowners — this is a genuine selling point.
- Get at least three quotes. Prices can vary by 40–60% for identical work. The lowest bid isn’t always the worst option, but the lowest bid without a clear scope of work is always a red flag.
- Verify licensing and insurance. In 2026, most states require waterproofing contractors to carry general liability and workers’ compensation insurance. Verify this independently — don’t just take their word for it.
- Ask for references from projects completed 3–5 years ago. Recent references are easy to cherry-pick. References from jobs done several years ago will tell you how the system has held up and how the company handles long-term warranty claims.
Common DIY Mistakes
For homeowners tackling drainage improvements independently (particularly surface grading and downspout extensions), these are the most frequently made errors:
- Incorrect slope on drain pipe: Perforated drain pipe needs a minimum slope of 1% (1 inch of drop per 8 feet) to maintain gravity flow. Insufficient slope allows sediment buildup and eventual blockage.
- Skipping filter fabric: Without filter fabric wrapped around the drainage pipe and surrounding gravel, fine soil particles migrate into the system over time, clogging it within 5–7 years.
- Improper sump pit depth: The sump pit needs to be deep enough to accommodate the pump, the float mechanism’s range of motion, and the drainage pipe inlet — typically a minimum of 24 inches deep and 18 inches in diameter.
- Discharging too close to the house: Sump pump discharge pipes should terminate a minimum of 10 feet from the foundation — and should direct water toward a downslope area, a dry well, or a municipal storm drain connection where permitted.
Frequently Asked Questions
How do I know if I need an interior or exterior drainage system?
The decision hinges on two factors: the source of water intrusion and your budget. If water is entering primarily through wall cracks driven by hydrostatic pressure, an interior perimeter system is typically the most cost-effective and least disruptive solution. If you’re building new, managing significant surface water runoff, or planning a major renovation that will expose your foundation anyway, exterior drainage is worth the additional investment. For most homeowners with existing water problems, an interior French drain paired with a quality sump pump system will resolve the issue comprehensively. A professional moisture assessment — which many reputable waterproofing companies offer for free or a nominal fee — is the most reliable way to determine the right approach for your specific situation.
How long does a basement drainage system installation take?
Interior French drain installation for a typical 1,000–1,500 square foot basement takes between two and four days. Exterior drainage systems require excavation and can take one to two weeks depending on the scope. The good news is that modern interior systems require no curing time — your basement is functional and ready for use as soon as the concrete channel fill cures (typically 24–48 hours). Contractors will typically phase the work around your schedule, and in most cases, you can remain in the home throughout the installation process, though expect dust, noise, and some disruption to basement access.
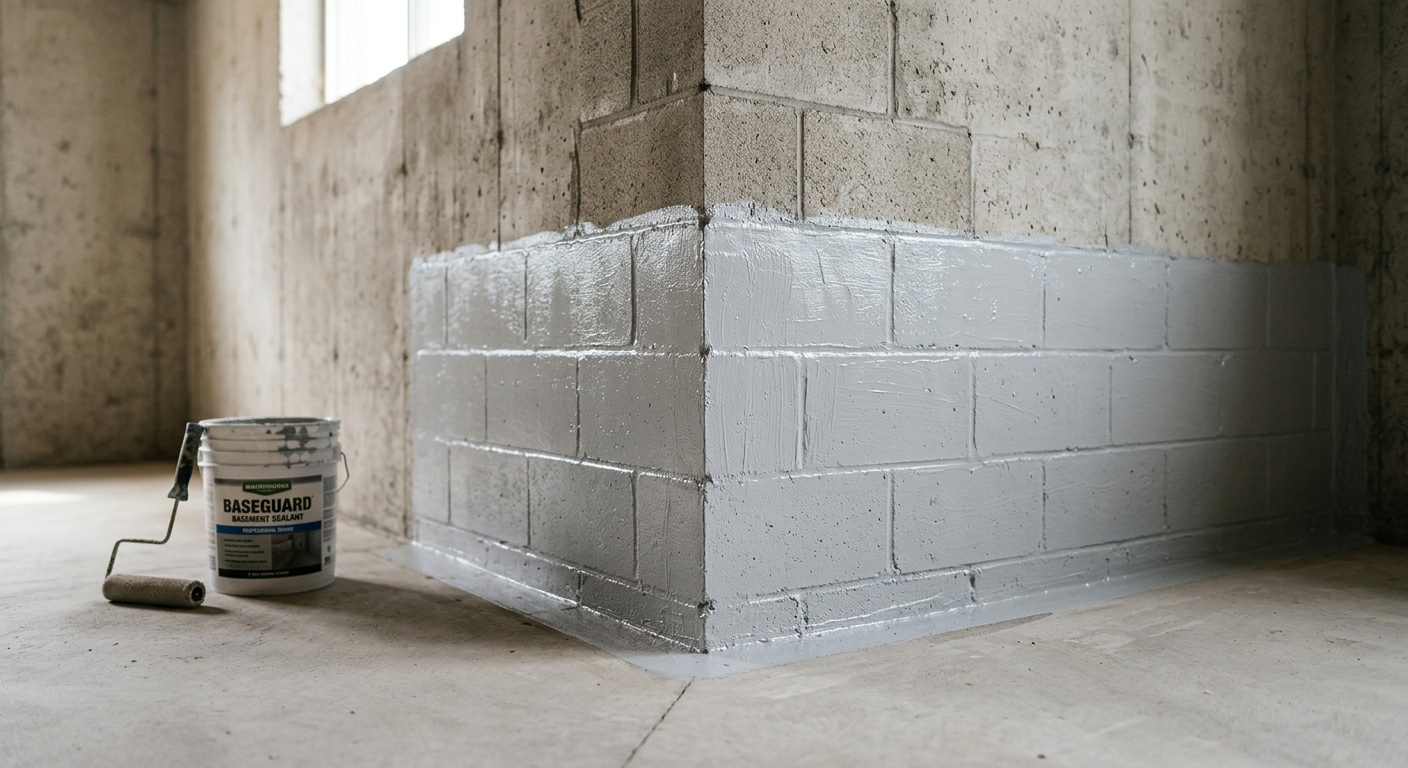
Will a drainage system alone solve my basement moisture problem, or do I need waterproofing too?
Drainage systems and waterproofing membranes serve complementary but distinct functions. A drainage system manages water — capturing it and directing it away before it accumulates. A waterproofing membrane resists water — creating a barrier that prevents it from passing through walls or floors. For comprehensive, permanent protection, the ideal approach combines both: a drainage system handles any water that penetrates or rises, while a waterproofing membrane reduces the volume of water that enters in the first place. In high-water-table situations or regions with significant annual precipitation, skipping the waterproofing membrane in favor of drainage alone means your sump pump will run constantly and your foundation remains unnecessarily stressed. Think of drainage as your safety net and waterproofing as your first line of defense.
Your Dry Basement Action Plan: Next Steps That Actually Work
You now have the knowledge foundation. Here’s how to translate it into action — intelligently, efficiently, and without wasting money on the wrong solutions.
Your 5-Step Basement Drainage Implementation Roadmap:
- Conduct your diagnostic assessment (Week 1): Use the aluminum foil test described earlier to determine whether you’re dealing with condensation or active water intrusion. Walk your property perimeter after rainfall and observe where water pools. Check your gutters, downspouts, and grading — many mild water issues are solved with these free or low-cost interventions alone.
- Get professional moisture mapping (Week 2–3): Contact 2–3 reputable waterproofing contractors for assessments. Tell them you’re collecting quotes and ask specifically for written reports, not just verbal recommendations. A contractor who refuses to put their assessment in writing is a contractor worth avoiding.
- Match your system to your situation (Week 3–4): Use the comparative table and case studies in this guide to pressure-test contractor recommendations. If you have surface water issues, don’t let anyone sell you an expensive exterior system without first trying improved grading and downspout extensions.
- Prioritize sump pump backup capacity (Installation day): Whatever drainage system you choose, insist on a battery backup sump pump. Budget an additional $300–$600 for this component. It’s the single most important insurance policy your drainage system can have.
- Schedule annual maintenance checks (Ongoing): Pour a bucket of water into your sump pit every six months to confirm the float switch activates the pump. Inspect drain pipe outlets for blockages each spring. Replace sump pump units proactively every 7–10 years rather than waiting for failure.
As climate volatility continues to reshape precipitation patterns across North America, Europe, and beyond, basement waterproofing is evolving from a reactive emergency measure to a proactive element of smart home management. Homeowners who invest in comprehensive drainage infrastructure today are not just protecting their basements — they’re future-proofing their most valuable asset against an increasingly unpredictable environment.
Here’s the question worth sitting with: When the next major storm hits your area — and in 2026, the question is when, not if — will your basement be ready? The best time to install a proper drainage system is before the water arrives. The second best time is right now.