Crawl Space Encapsulation vs Basement Waterproofing Explained Simply
Reading time: 12 minutes
Your home is quietly fighting a battle you may not even know is happening. Beneath your floors, moisture is either being managed—or slowly causing damage that compounds every single season. If you’ve ever Googled “wet crawl space fix” or “basement flooding solutions” at midnight after a heavy rainstorm, you already know the anxiety that comes with water intrusion problems.
Here’s the straight talk: crawl space encapsulation and basement waterproofing are not the same thing, and confusing the two can cost you thousands of dollars in misapplied solutions. Yet homeowners mix them up constantly—and contractors sometimes let that confusion work in their favor.
This guide cuts through the noise. Whether you’re dealing with musty smells, visible moisture, cracked walls, or just trying to future-proof your home before listing it for sale, you’ll leave here knowing exactly what you need, why you need it, and what it’ll realistically cost you in 2026.
Table of Contents
- What Is Crawl Space Encapsulation?
- What Is Basement Waterproofing?
- Key Differences at a Glance
- When Do You Need Which Solution?
- Costs, ROI, and What to Expect in 2026
- 3 Common Challenges and How to Overcome Them
- Real-World Case Studies
- Solution Effectiveness Comparison
- Frequently Asked Questions
- Your Moisture-Free Home Roadmap
What Is Crawl Space Encapsulation?
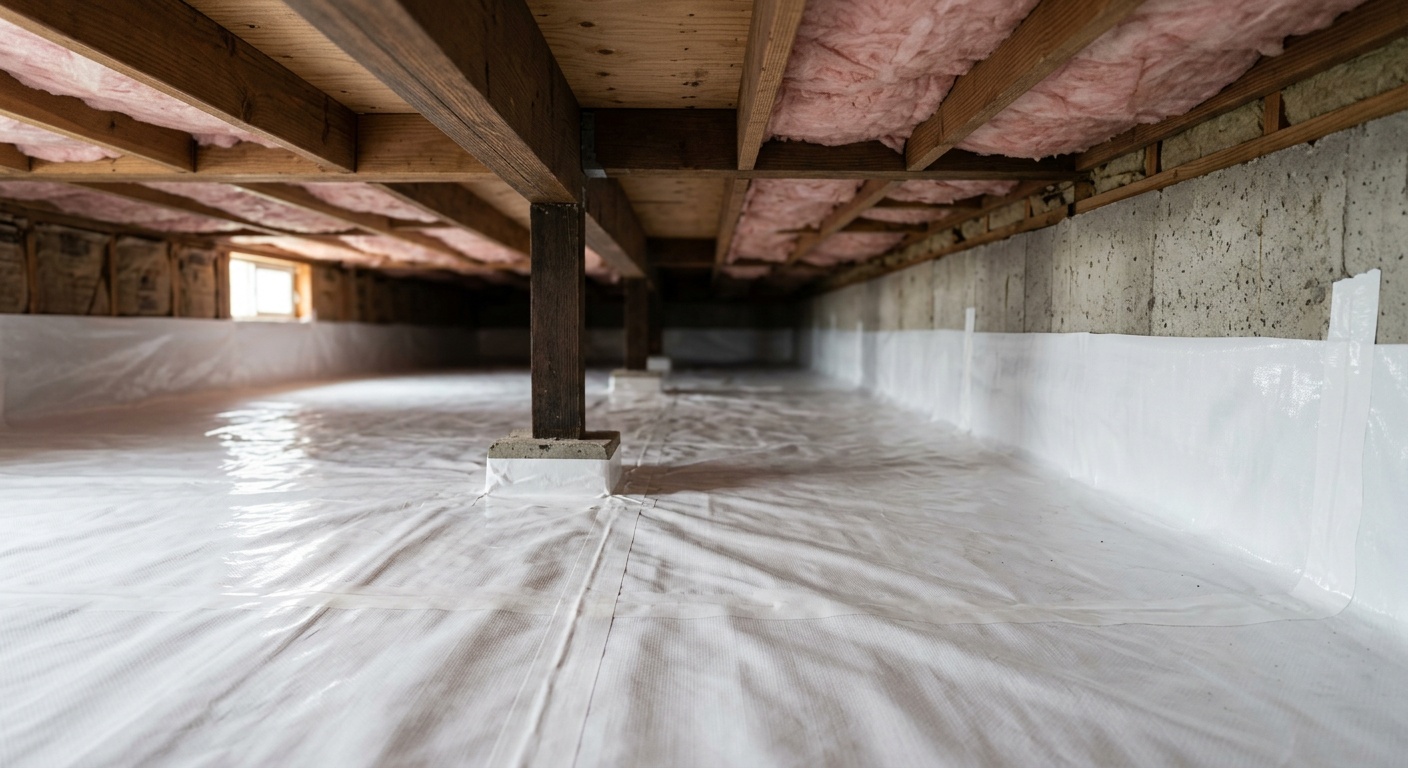
Think of crawl space encapsulation as wrapping the underbelly of your home in a protective shell. It’s a system designed specifically for homes built on a crawl space foundation—that low, unfinished space between the ground and your first floor that’s typically 18 to 36 inches tall.
In a traditional vented crawl space, outdoor air flows in and out freely. The problem? That air carries moisture. In humid climates—or even during seasonal transitions in drier regions—that moisture condenses on cold surfaces, feeding mold, rotting floor joists, attracting pests, and degrading insulation over time.
What the Encapsulation Process Actually Involves
A full crawl space encapsulation project typically includes several interconnected components:
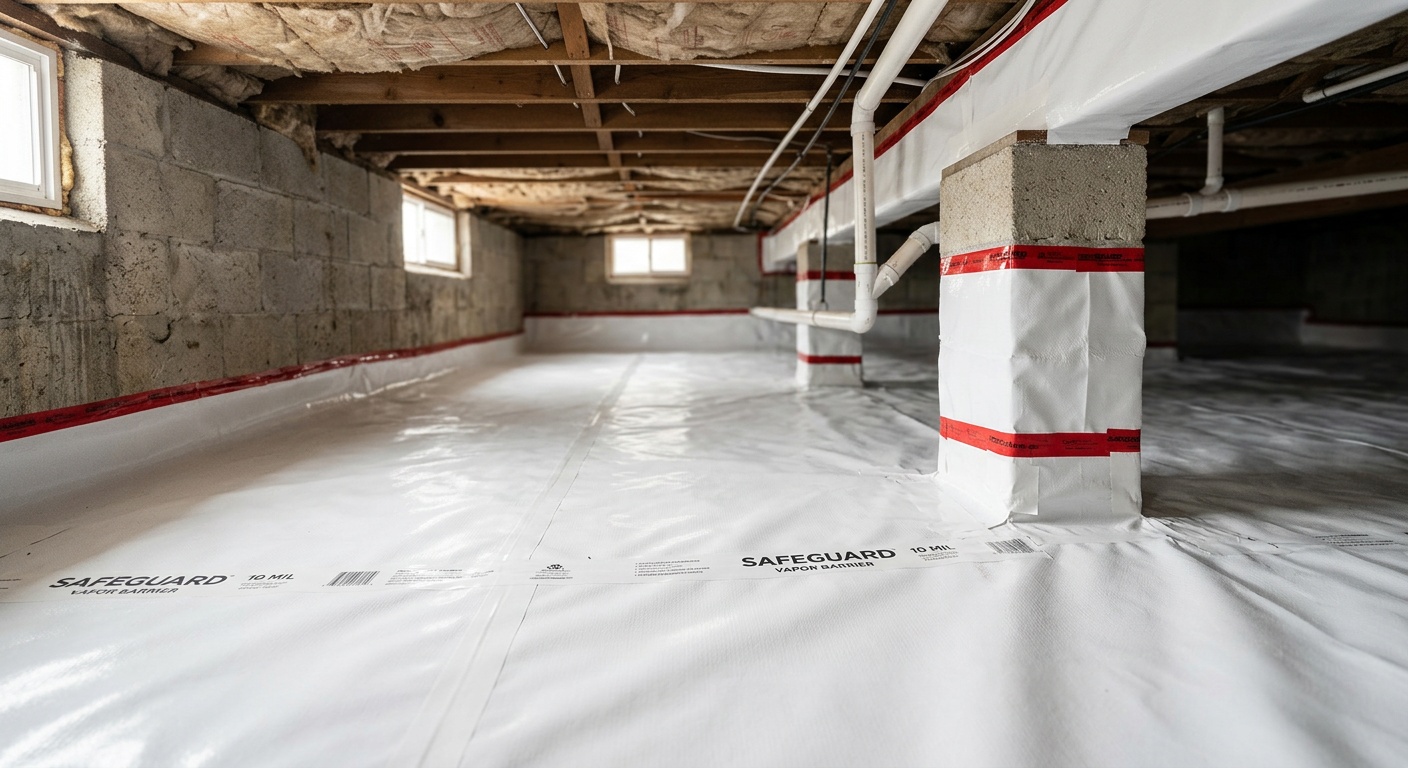
- Heavy-duty vapor barrier installation: A thick polyethylene liner (usually 12–20 mil) is laid across the entire crawl space floor and run up the walls, sealing the space from ground moisture.
- Vent sealing: Existing vents are permanently closed or sealed to prevent unconditioned outdoor air from entering.
- Dehumidifier installation: A crawl space-specific dehumidifier is mounted to maintain relative humidity below 60%—the threshold above which mold thrives.
- Drainage system (if needed): In cases with minor water intrusion, an interior drainage channel may be added along the perimeter.
- Insulation improvements: Rigid foam board insulation is often added to the walls instead of—or in addition to—the floor joists above.
According to the Building Science Corporation, encapsulated crawl spaces consistently show lower moisture levels, better indoor air quality, and reduced energy costs compared to vented crawl spaces. A 2025 study by the Home Innovation Research Labs found that homes with encapsulated crawl spaces used up to 18% less energy for heating and cooling compared to identical homes with vented crawl spaces.
“The crawl space is the lungs of your home. What happens down there doesn’t stay down there—it circulates throughout your entire living environment.” — Dr. Joseph Lstiburek, Building Scientist, Building Science Corporation
Who Needs Crawl Space Encapsulation?
You’re a strong candidate if:
- Your home sits on a crawl space foundation (common in the Southeast, Mid-Atlantic, and parts of the Pacific Northwest)
- You notice musty odors on the first floor, especially in spring and fall
- Your floors feel soft, springy, or uneven
- You’ve seen evidence of mold, mildew, or pest activity underneath the home
- Your energy bills are higher than expected for your home’s size
- Allergy symptoms seem worse inside your home than outside
What Is Basement Waterproofing?
Basement waterproofing is a broader category of solutions designed to keep water out of—or managed within—a full below-grade basement space. Unlike crawl spaces, basements are designed to be usable rooms. The stakes are higher because water intrusion can damage finished living areas, ruin stored belongings, compromise structural foundations, and create serious mold conditions.
Basement waterproofing is not a single product or method—it’s actually a spectrum of approaches ranging from simple sealants to full excavation projects.
The Three Main Approaches to Basement Waterproofing
1. Interior Waterproofing (Most Common)
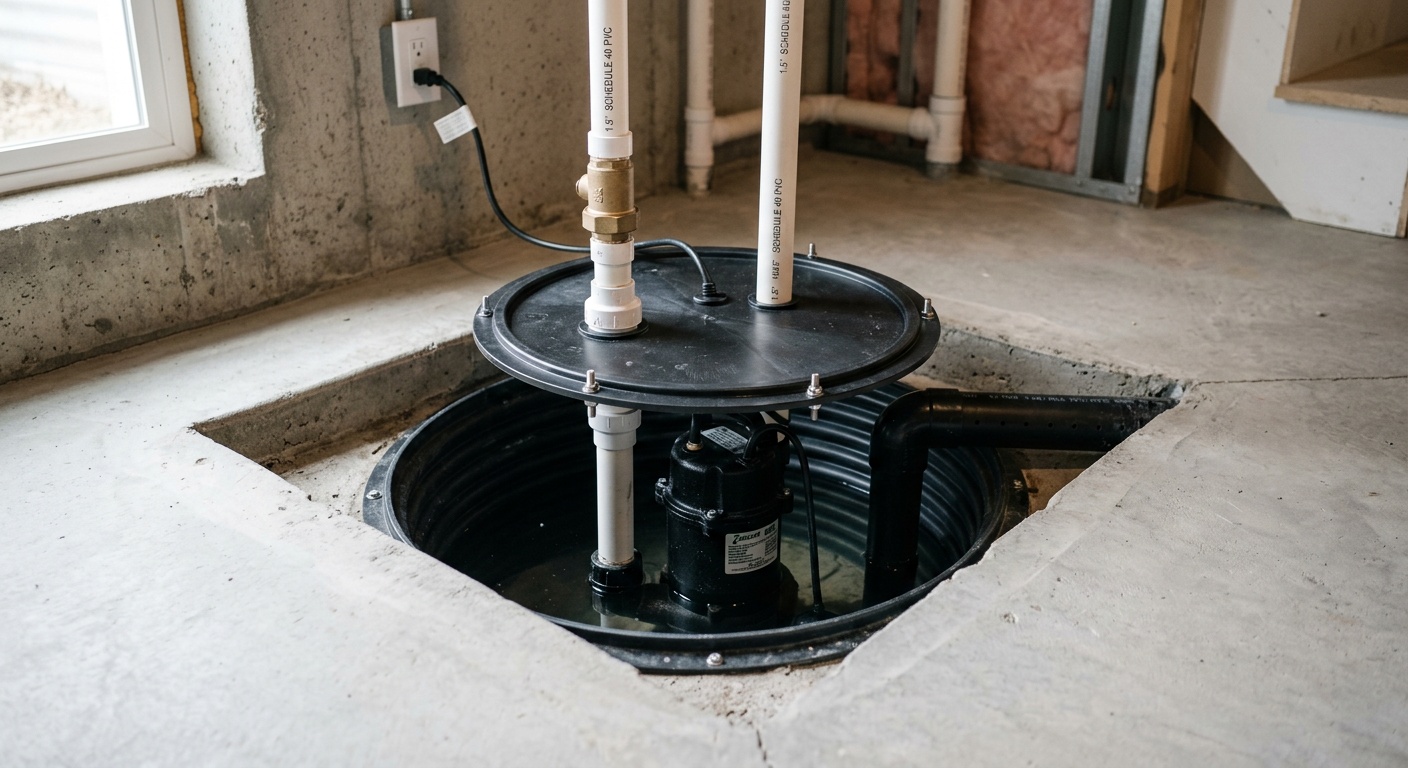
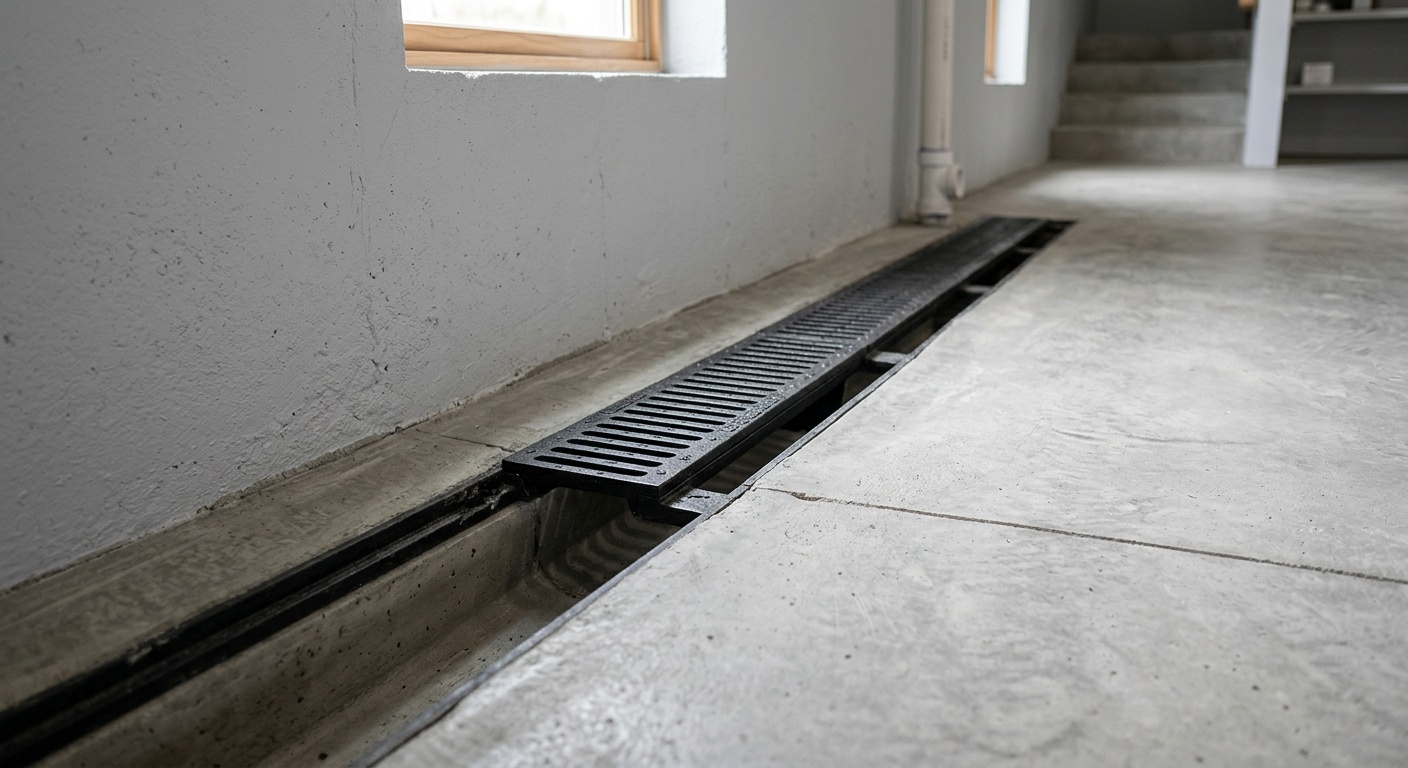
This approach manages water after it enters the basement rather than preventing entry. Systems include interior drain tiles (perimeter channels installed beneath the floor slab), sump pumps, and interior wall coatings or membranes. Interior waterproofing is the most popular option in 2026 because it’s significantly less expensive than exterior methods and highly effective when properly installed.
2. Exterior Waterproofing (Most Comprehensive)
This method addresses the problem at the source by excavating around the foundation, applying waterproof membranes and coatings to the exterior walls, and installing exterior drainage systems. It’s the gold standard but can cost $15,000–$30,000 or more depending on home size and soil conditions. It’s typically recommended only when interior methods have failed or structural issues need direct attention.
3. Crack Injection and Surface Sealing (Least Invasive)
Polyurethane or epoxy injections seal individual cracks in poured concrete walls. Wall sealers and waterproof paints add a surface layer of protection. These are appropriate for minor, isolated issues but are not comprehensive solutions for chronic water problems.
The National Association of Waterproofing and Structural Repair Contractors (NAWSRC) reported in early 2026 that interior drainage systems combined with high-capacity sump pumps resolve over 85% of residential basement water intrusion complaints when installed correctly.
Key Differences at a Glance
| Factor | Crawl Space Encapsulation | Basement Waterproofing |
|---|---|---|
| Foundation Type | Crawl space foundations only | Full basements (below-grade) |
| Primary Goal | Moisture control + air quality + energy efficiency | Prevent water infiltration + protect living space |
| Average 2026 Cost | $5,000–$15,000 | $4,500–$30,000+ |
| Water Source Addressed | Ground moisture, humidity, condensation | Hydrostatic pressure, surface water, groundwater |
| Disruption Level | Low to moderate (work in crawl space) | Moderate to high (interior/exterior excavation) |
When Do You Need Which Solution?
This is where most homeowners get confused—and where honest guidance matters most. The answer isn’t always one or the other. Sometimes you need both. Sometimes you need neither right now but should plan ahead.
Scenarios That Point Clearly to Encapsulation
- Scenario A: You live in coastal Virginia and notice that every spring, your hardwood floors warp slightly. There’s no standing water, but a flashlight tour under the house reveals black mold spots on the joists and wet insulation hanging down. This is a classic humidity and condensation problem—encapsulation with a dehumidifier will resolve it directly.
- Scenario B: You’re selling your home and the inspection report flags high moisture readings in the crawl space. Encapsulation dramatically improves moisture metrics and adds demonstrable value to the sale.
- Scenario C: Your HVAC system is in the crawl space, and its efficiency keeps declining. Encapsulation reduces the thermal load on the system by conditioning the space.
Scenarios That Point to Basement Waterproofing
- Scenario D: After heavy rain in spring 2026, you find an inch of standing water in your basement. A sump pump isn’t keeping up. This is an active water intrusion problem requiring an interior drainage system upgrade or exterior waterproofing evaluation.
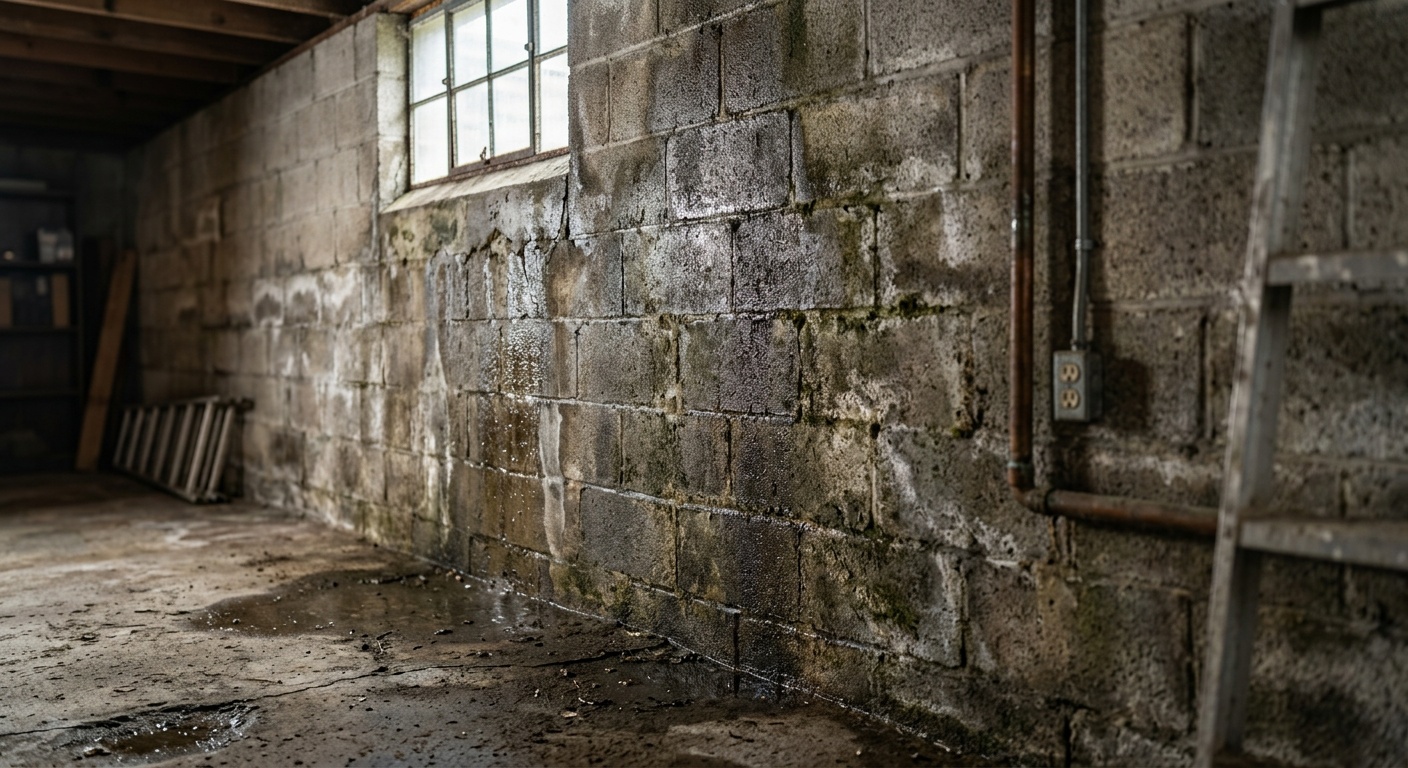
- Scenario E: White, chalky deposits (efflorescence) are appearing on your basement walls. This indicates mineral-rich groundwater is pushing through the concrete under hydrostatic pressure—a classic signal for waterproofing intervention.
- Scenario F: You want to convert your unfinished basement into a home office or bedroom. Before any finishing work begins, waterproofing is non-negotiable.
Pro Tip: If you have a crawl space AND a partial basement, you may need both systems working together. A unified moisture management approach—encapsulating the crawl space and waterproofing the basement—creates a fully protected below-grade envelope.
Costs, ROI, and What to Expect in 2026
Let’s talk numbers honestly. Material and labor costs have continued to rise through 2025 and into 2026, driven by continued supply chain normalization and increased labor specialization in the waterproofing industry.
Crawl Space Encapsulation Costs in 2026
- Basic vapor barrier only (DIY-grade): $1,500–$3,000 (materials only, not recommended for serious moisture issues)
- Professional full encapsulation (barrier + dehumidifier + vent sealing): $5,000–$10,000 for average-sized crawl space (1,000–1,500 sq ft)
- Premium system with drainage channel and structural repairs: $10,000–$15,000+
Basement Waterproofing Costs in 2026
- Crack injection (per crack): $400–$800
- Interior drain tile + sump pump system: $4,500–$12,000 depending on basement perimeter
- Full exterior waterproofing (excavation + membrane + drain): $15,000–$30,000+
From an ROI perspective, a 2025 report from Remodeling Magazine’s Cost vs. Value study found that basement waterproofing returns approximately $0.70 on every dollar spent in increased home value, while crawl space encapsulation returns approximately $0.65 on every dollar—both strong performers in the current real estate market.
3 Common Challenges and How to Overcome Them
Challenge 1: Choosing the Wrong Contractor
The waterproofing industry, unfortunately, has its share of high-pressure sales tactics and overselling. A contractor who immediately recommends the most expensive solution without a thorough diagnostic is a red flag. How to overcome it: Get at least three quotes. Ask for a written moisture assessment report before any work begins. Request references from customers with similar foundation types in your geographic region.
Challenge 2: Treating Symptoms Instead of Root Causes
Many homeowners apply wall sealers or purchase portable dehumidifiers as band-aid fixes. These may temporarily reduce humidity readings but do nothing to address grading issues, gutter failures, or foundation cracks that are the true sources of moisture. How to overcome it: Always start with an exterior inspection. Ensure gutters extend at least 6 feet from the foundation. Confirm that soil grading slopes away from the home at a 6-inch drop over 10 feet before investing in interior systems.
Challenge 3: Ignoring the Problem Until It’s Catastrophic
Wood rot in crawl space floor joists, once advanced, can require $10,000–$25,000 in structural repairs before encapsulation even begins. Mold remediation in a basement, if left untreated, can reach $15,000–$30,000 for severe infestations. How to overcome it: Annual inspections are your best investment. A $200–$400 professional crawl space or basement inspection every year can identify developing problems before they compound into structural emergencies.
Real-World Case Studies
Case Study 1: The North Carolina Ranch House
In early 2025, a homeowner in Raleigh, NC, noticed that her allergist had mentioned elevated mold spore counts in her bloodwork. Her 1,400 sq ft ranch house sat on a vented crawl space that had never been treated in its 34-year history. A professional assessment found relative humidity in the crawl space regularly exceeding 80% during summer months, with visible mold on roughly 40% of the floor joists.
The solution: A full encapsulation with 20-mil vapor barrier, sealed vents, a commercial-grade dehumidifier rated for 90 pints/day, and mold remediation on the affected joists. Total cost: $8,700. Within one season, indoor air quality tests showed a 74% reduction in airborne mold spores on the first floor. Her energy bills dropped by $112/month in summer.
Case Study 2: The Chicago Finished Basement
A homeowner in the western suburbs of Chicago finished his basement in 2021—flooring, drywall, a home theater setup—without any prior waterproofing. By spring 2026, after two consecutive wet winters and heavy spring thaw, he discovered water seeping through the base of his poured concrete walls, warping the flooring and growing mold behind the drywall.
The solution required two phases: mold remediation and drywall removal ($6,200), followed by an interior drain tile system with a battery-backup sump pump ($9,400). The total cost of not waterproofing before finishing? Over $15,600—significantly more than the $7,000–$8,000 waterproofing system would have cost in 2021. Lesson learned: waterproofing before finishing is always cheaper than waterproofing after.
Solution Effectiveness Comparison
The chart below compares key performance metrics across common moisture management solutions, rated on a scale of 0–100 based on 2026 industry data and homeowner satisfaction surveys.
Moisture Solution Effectiveness Ratings (2026)
Full Crawl Space Encapsulation
Interior Basement Drain System + Sump Pump
Exterior Basement Waterproofing
Wall Sealers / Surface Coatings Only
Portable Dehumidifier Only
Source: NAWSRC Homeowner Satisfaction Survey, 2026 | Ratings reflect long-term moisture control outcomes
Frequently Asked Questions
Can I encapsulate my crawl space myself, or do I always need a professional?
DIY crawl space encapsulation is technically possible for motivated homeowners with moderate physical fitness and comfort working in tight spaces. Basic vapor barrier installation using 6-mil or 10-mil polyethylene can be a weekend project costing $500–$1,500 in materials. However, a truly effective system—one that includes proper seam sealing, vent closure, dehumidifier sizing, and drainage management—requires professional expertise. Improperly installed vapor barriers can trap moisture in the wrong places, accelerating the very problems you’re trying to prevent. For a full encapsulation meant to last 20+ years, professional installation is strongly recommended.
Does homeowner’s insurance cover crawl space encapsulation or basement waterproofing?
In most standard homeowner’s insurance policies in 2026, moisture damage resulting from gradual seepage, humidity, or poor maintenance is explicitly excluded. Insurance is designed to cover sudden and accidental events—like a burst pipe—not chronic moisture conditions. However, if water damage to your crawl space or basement results from a covered peril (such as a sudden storm causing flash flooding covered under a separate flood insurance policy), some remediation costs may be eligible. Always review your specific policy and consult your insurance agent before assuming coverage. Some states have introduced legislation requiring clearer moisture damage disclosures in policy language, so it’s worth reviewing your policy documents annually.
How long do crawl space encapsulation and basement waterproofing systems last?
A professionally installed crawl space encapsulation using high-quality 20-mil vapor barriers typically carries manufacturer warranties of 25 years, with realistic functional lifespans of 20–30 years when paired with a properly maintained dehumidifier. Basement interior drainage systems—drain tiles and sump pumps—have longer infrastructure lifespans (25–30 years for the drainage channel itself), but sump pump motors typically need replacement every 7–10 years. Exterior waterproofing membranes, when properly applied, can last 15–25 years. Regular annual inspections and dehumidifier filter maintenance are the key activities that protect the longevity of any system.
Your Moisture-Free Home Roadmap
You now have the clarity that most homeowners spend months trying to piece together from conflicting contractor pitches and generic online articles. Here’s how to turn that knowledge into action.
Step 1: Diagnose Before You Spend
Schedule a professional inspection—not a free estimate from a waterproofing contractor (who has an incentive to sell), but an independent home inspector or structural engineer. A $300 inspection can save you from a $10,000 mistake. Ask specifically for moisture readings, mold assessment, and drainage evaluation.
Step 2: Address Exterior Grading and Gutters First
Before any interior or under-home system is installed, ensure your first line of defense is solid. Gutters should be clean, downspouts extended, and soil graded away from the foundation. This free-to-low-cost step eliminates the source of a significant percentage of moisture problems.
Step 3: Match the Solution to Your Foundation Type
Crawl space? Encapsulation is your primary tool. Full basement? Waterproofing system selection depends on water volume, source, and your plans for the space. Hybrid foundation? Plan for both systems working in coordination.
Step 4: Get Three Competing Quotes with Written Scope
Any reputable contractor should provide a detailed written scope of work—not just a total price. Compare materials specified, warranty terms, and whether the system addresses root causes or just symptoms.
Step 5: Maintain the System Annually
Set a calendar reminder every spring: inspect dehumidifier filters, check sump pump operation with a bucket of water, walk the crawl space or basement perimeter looking for any new cracks or seepage points. A 30-minute annual check protects your thousands of dollars of investment.
As climate patterns continue shifting in 2026—bringing more intense precipitation events across the U.S. Midwest and Southeast, and higher humidity patterns in traditionally dry regions—below-grade moisture management is moving from a reactive repair category into proactive home infrastructure planning. The homes that hold their value and protect their occupants over the next decade will be the ones where owners made informed, strategic decisions about moisture—not panicked, expensive emergency repairs.
So here’s the question worth sitting with: How well do you actually know what’s happening under your home right now? A flashlight and 20 minutes of curiosity might be the most valuable home inspection you do this year.